Accessing Mobile Banking
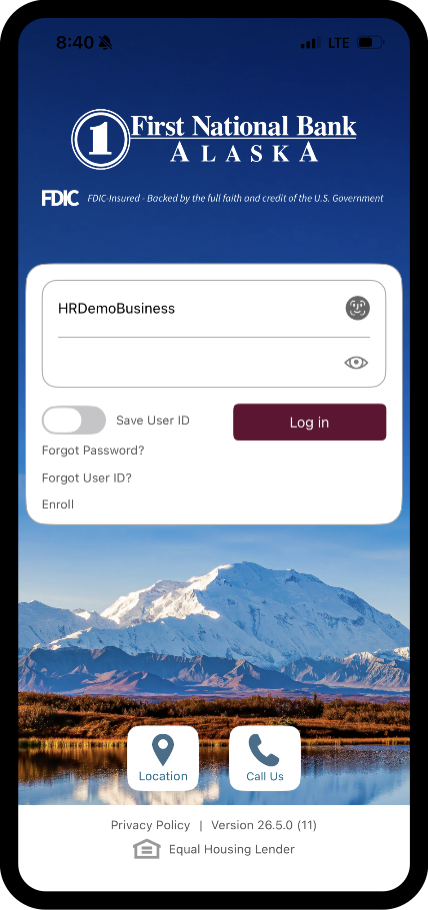
- Log in to online banking: Enter User ID and Password, then click the Log In button.
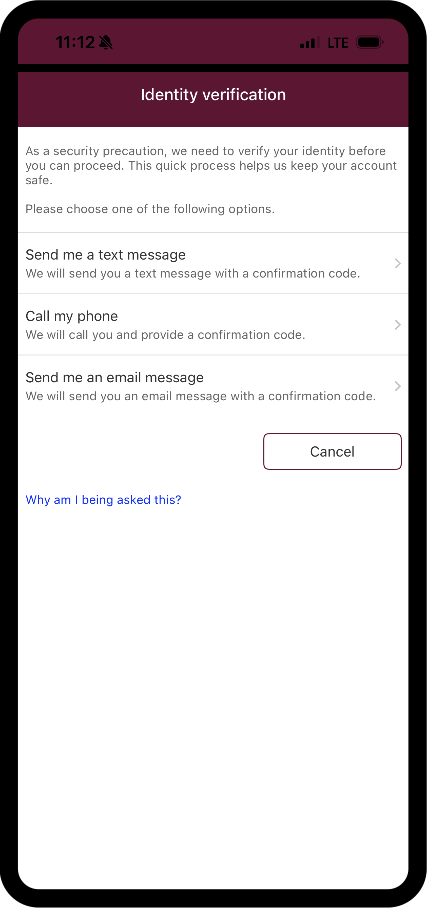
- For additional verification, the Identity Verification screen will display prompting how you would like to receive the One-Time PIN.
- Text (SMS) – Select Send me a text message
- Voice call – Select Call my phone
- Email – Select Send Me an email message
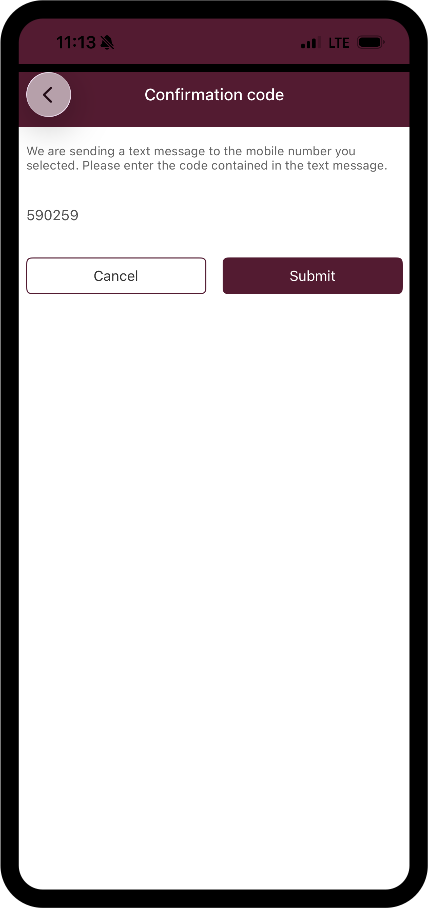
- Once the code is received, enter it in the Confirmation code field. Then click Submit.
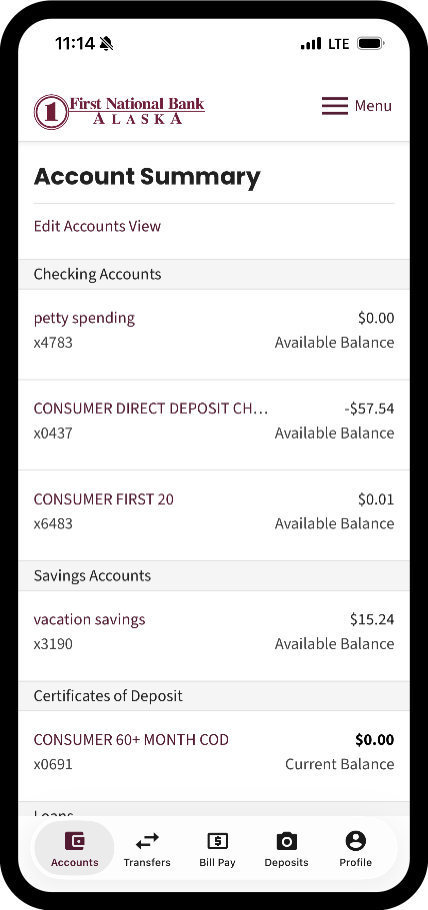
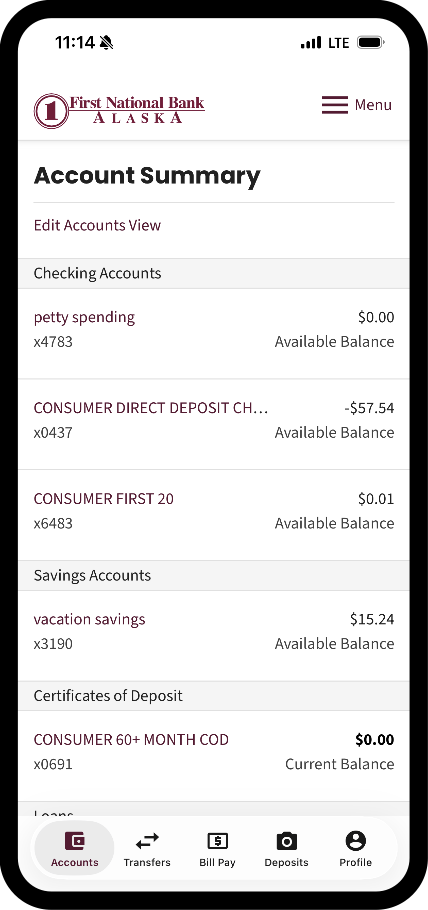
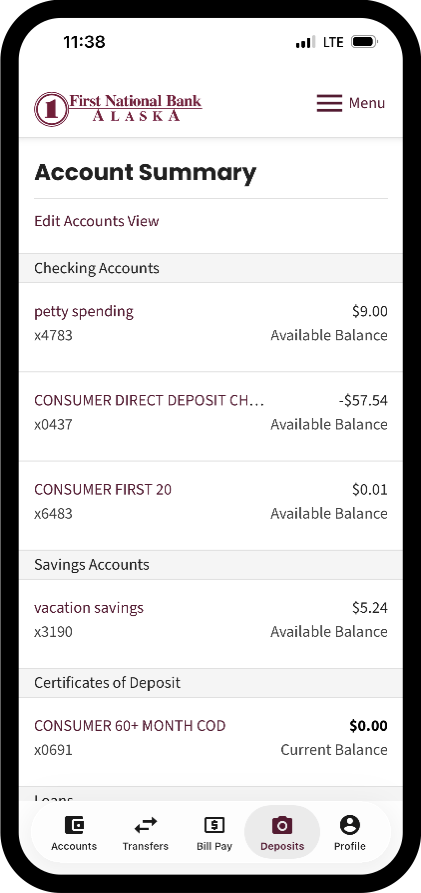
- Account Summary view displays.
Biometrics
Enroll a Device
To enable biometrics on device, you must first authorize your device.
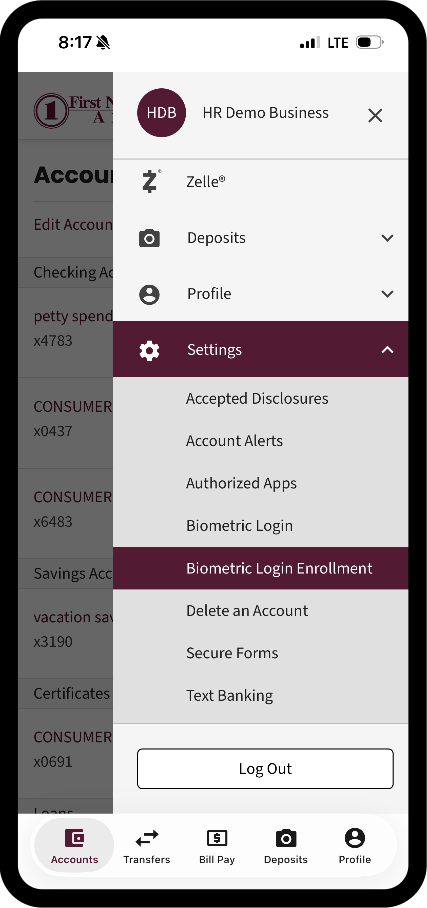
- On the Account Summary page, click on the hamburger menu at the top right corner of the page.
- Tap on the Settings tab, then select the Biometric Login Enrollment.
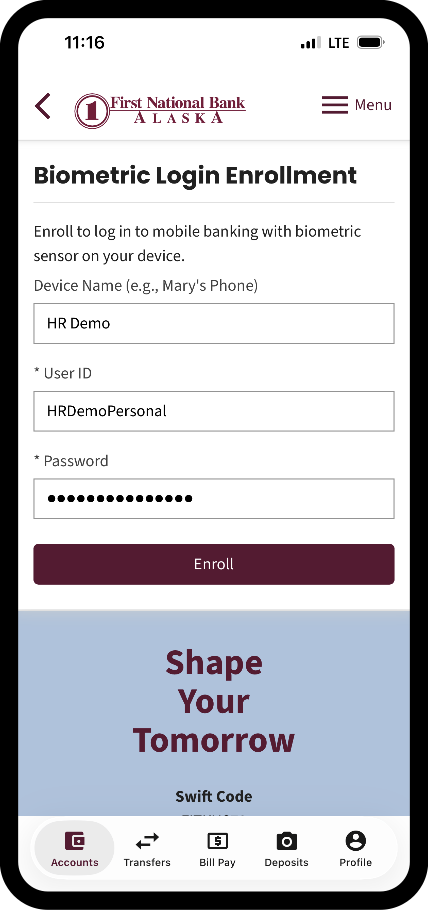
- Enter the online banking credentials listed:
- Device Name (Optional)
- User ID
- Password
Tap Enroll to complete enrollment.
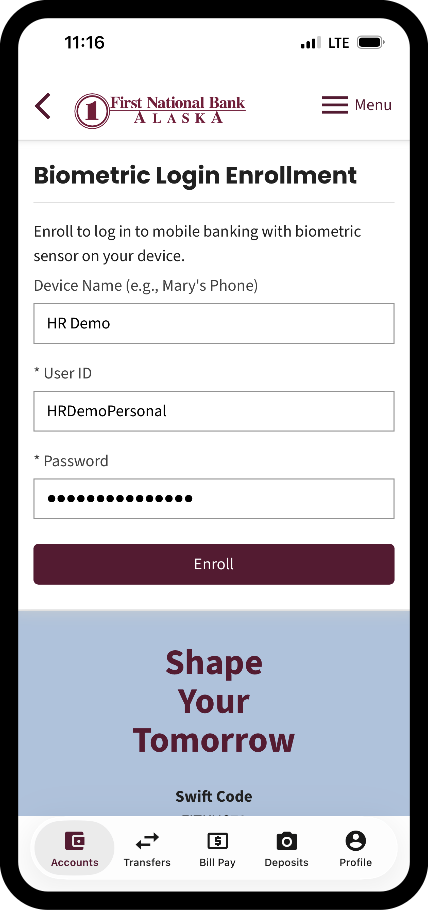
- A confirmation will display confirming the biometric enrollment.
Unenroll a Device
- On the Account Summary page, click on the hamburger menu at the top right corner of the page.
- Tap on the Settings tab, then select the Authorized Devices.
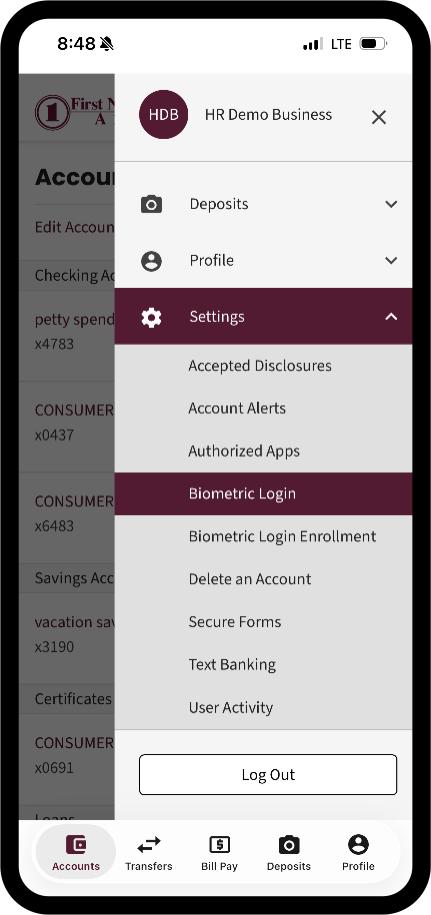
- Authorized Devices view displays the devices you authorized for your mobile banking.
Tap the Delete (trashcan) icon to unenroll the device.
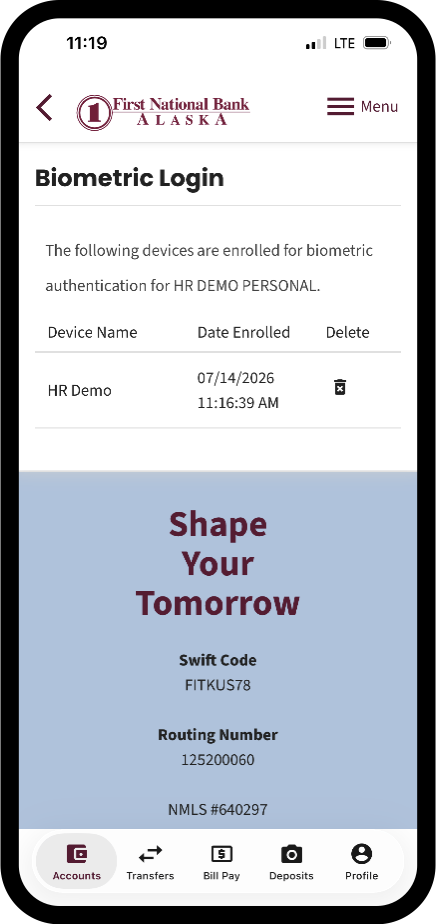
- A confirmation will display confirming the biometric has been deleted.
Accounts
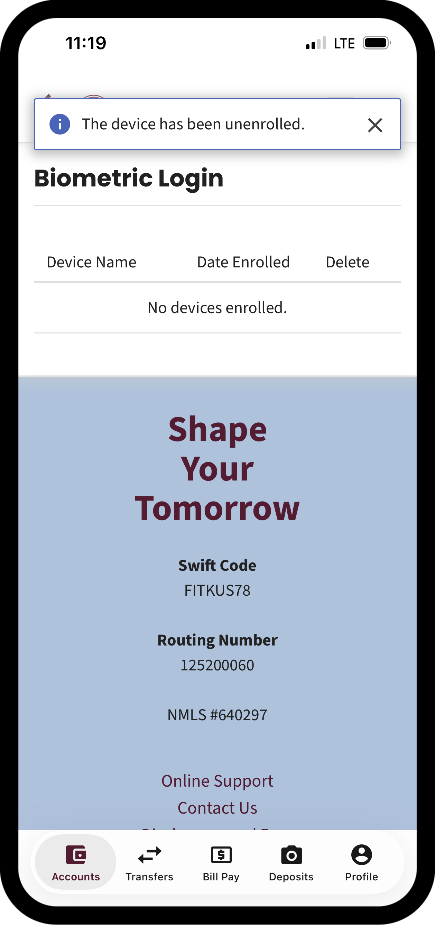
To change the order of your accounts:
- Click on the Edit Accounts View on the Account Summary page.
- Edit Accounts View displays.
- Drag the icon on the left side of the account name to rearrange the order of the account.
- Show All – this will show all account.
- Reset – resets the order of the account to default.
- Click Save to save the changes.
Stop Payments
On the Account Summary page, click on the hamburger menu at the top right corner of the page.
- Tap on the Accounts tab, then select the Stop Payments.
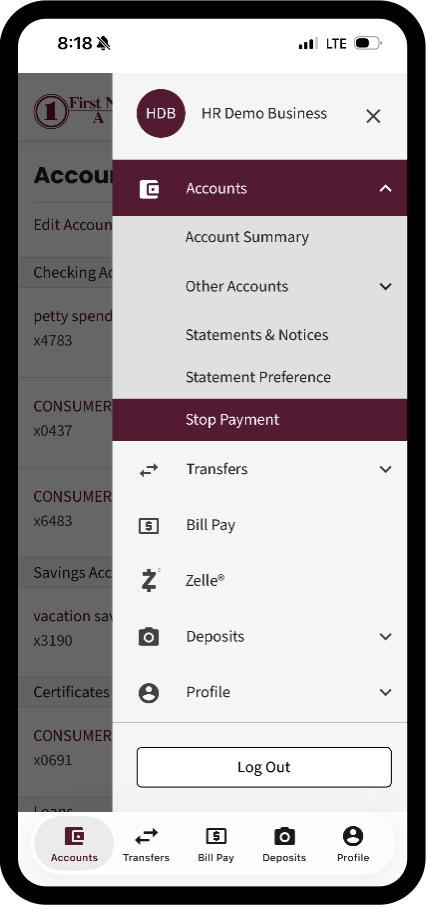
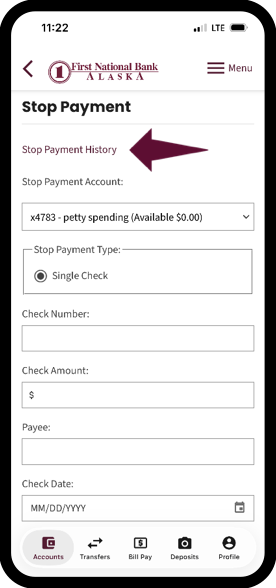
- The Stop Payment screen displays.
Select the Stop Payment Account dropdown to view the eligible accounts that allow stop payments.
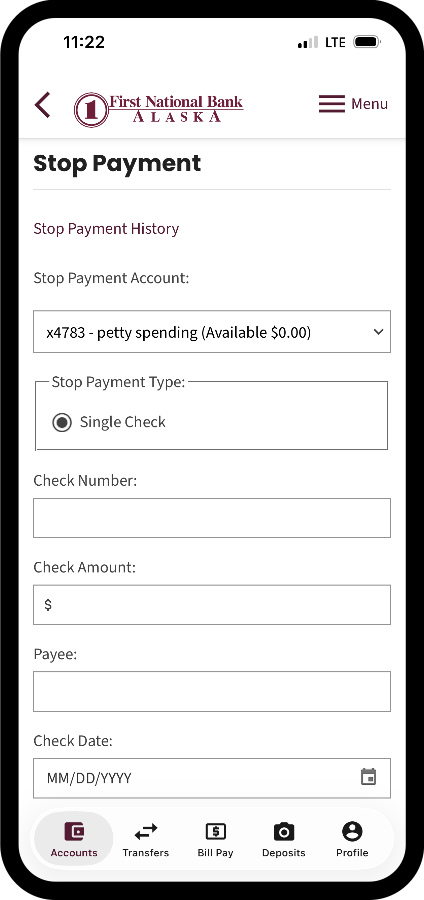
- Select the Stop Payment Type:
- For a single check:
- Enter the check number in the Check Number field.
- Enter the check amount in the Check Amount field.
- Click on the Calendar icon to select the date check was written.
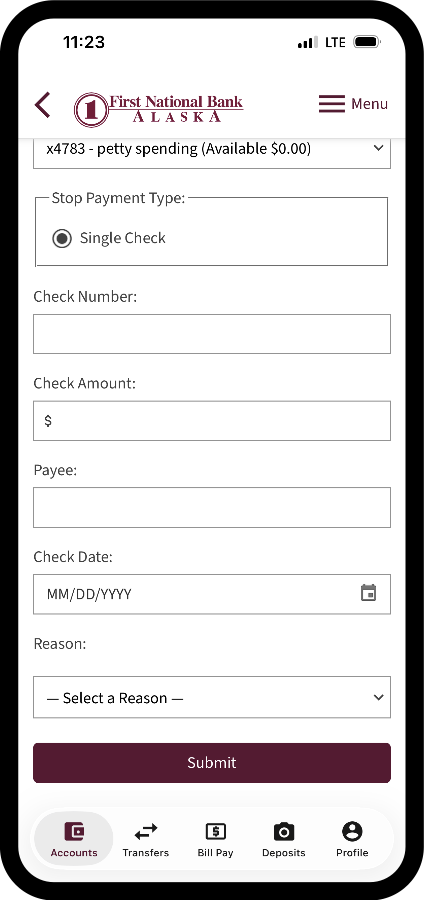
- Enter optional information, if needed.
- Payee
- Enter the reason for the stop payment.
- Select Submit
- A confirmation will display, whether it was placed or not placed. A stop payment will not be placed if:
The check has already been processed and cannot be stopped.
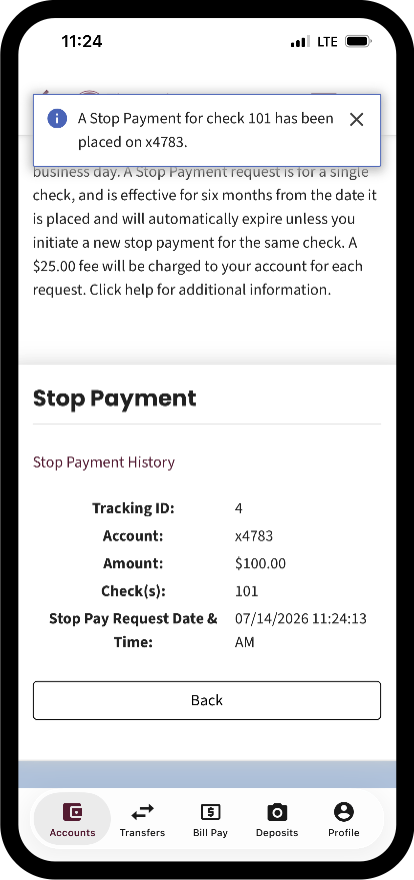
Stop Payment History
- Select the Stop Payment History link on the Stop Payment view.
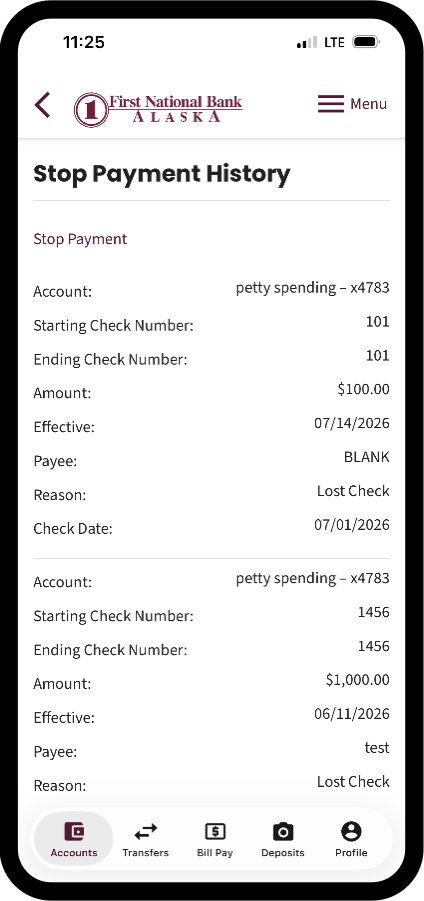
- The history section will display all active stop-payments.
Statement Preferences
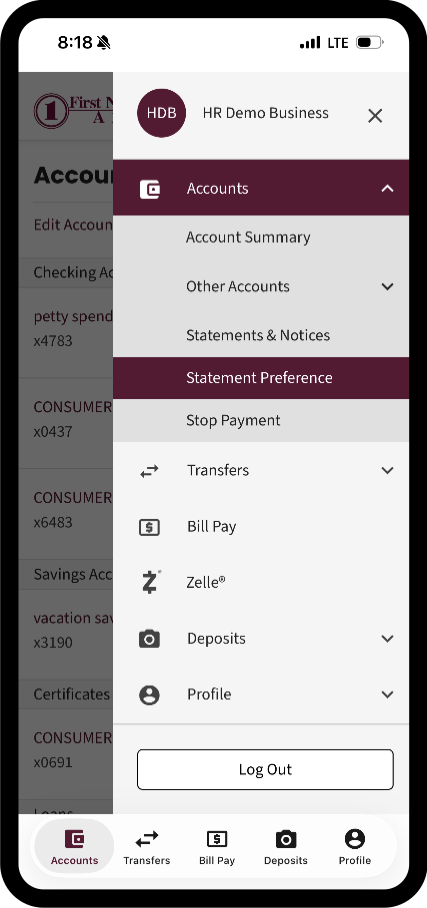
- On the Account Summary page, click on the hamburger menu at the top right corner of the page.
- Tap on the Accounts tab, then select the Statement Preferences.
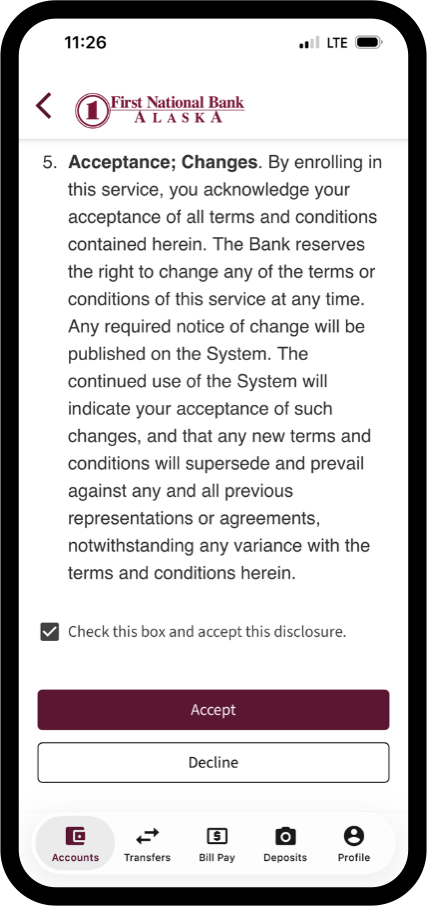
- If you have not signed it yet, an electronic document disclosure agreement will appear.
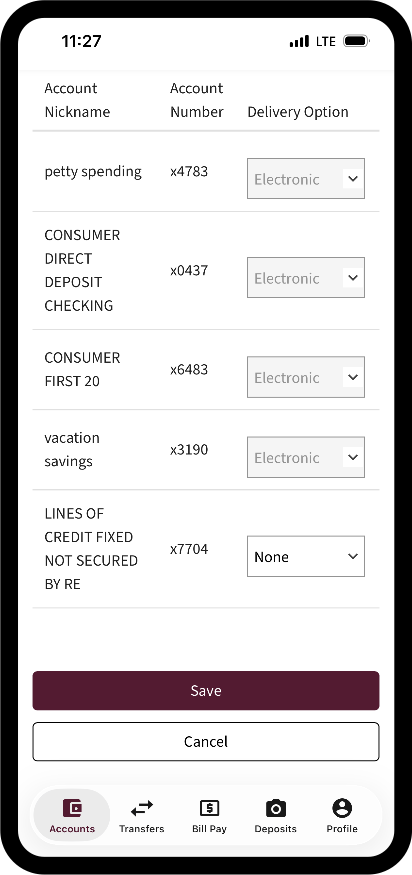
- The Statement Preference screen displays.
In the Delivery Option, select the preferred statement delivery method. Note: You can self-serve when going to electronic delivery but must use a Secure Form to change back to paper.
Once preferences had been set, tap Save to save the changes.
Zelle®
Follow the steps below:
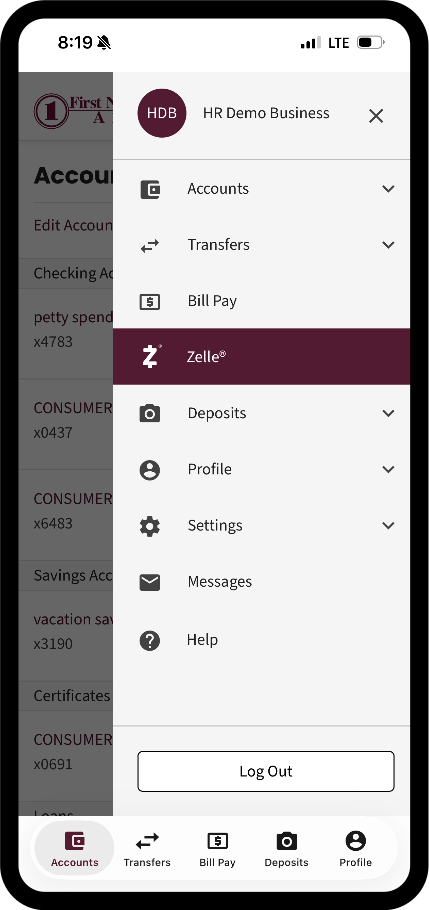
- On the Account Summary page, click on the hamburger menu at the top right corner of the page.
- Tap on the Zelle® tab.
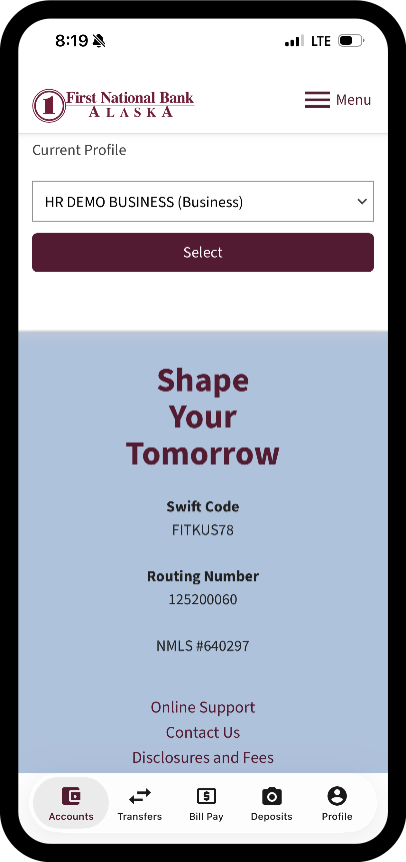
- Select the desire account to use for Zelle® on the Current Profile dropdown.
You may be presented with a SecureNow verification based on risk. You will select the method to receive your One-Time PIN and enter in the system to access Zelle®.
Transfers
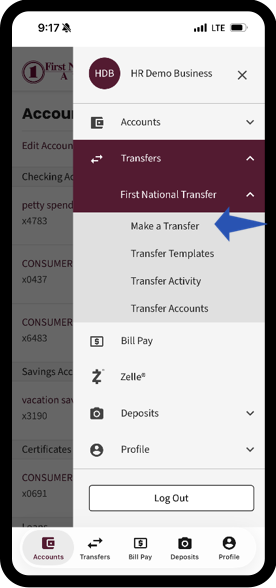
- On the Account Summary page, tap hamburger menu in the top right and select Transfers.
Transfers is only for internal account to account transfers or transfers to other First National customer accounts. External Transfers is found by clicking the hamburger > External Transfers.
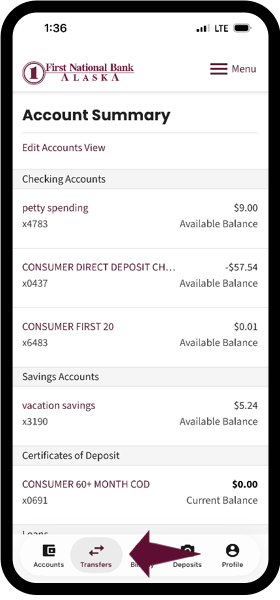
- Select Transfer Template.
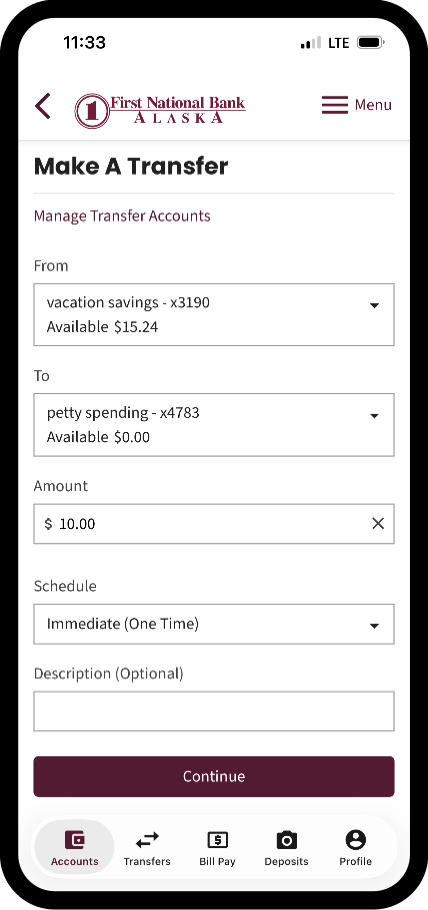
- On the Template dropdown, select a template if applicable. Or click Add Template to create a new template. Note: Entitlements for the user determine whether a transfer can be made without creating a template.
- To create a transfer without a template: Select the transfer source account from the From and To dropdown.
- Checking
- Savings
- Revolving liability accounts such home equity line of credit accounts may be a source account.
- Transfer source accounts:
- Checking
- Savings
- Revolving liability accounts such home equity line of credit accounts may be a source account.
- Destination accounts:
- Checking
- Savings
- Revolving liability accounts such home equity line of credit accounts may be destination accounts.
- Fixed liability accounts are only allowed as destination accounts for transfers.
- Commercial Loans
- Enter the amount in the Amount field
- From the Schedule dropdown, select one of the following options:
- Immediate (One-Time)
- Future (One-Time)
- Recurring
- Enter an optional description of the transfer in the Description field, if desired.
- Tap the Continue button to complete the transfer.
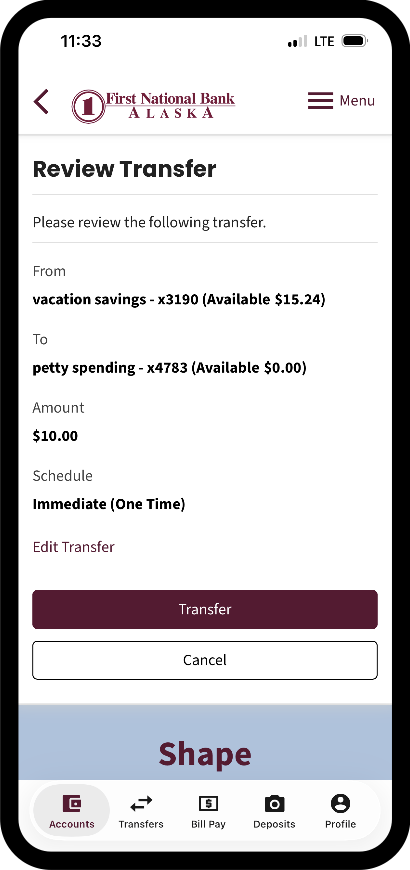
- The Review Transfer screen displays.
- Select the Edit Transfer link to return to the previous screen to change something.
- Select the Transfer button to complete the transfer.
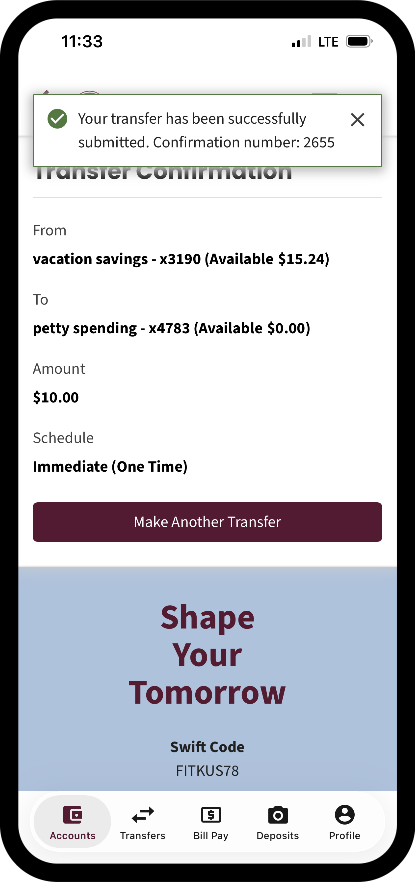
- A confirmation message displays with the unique transfer ID. Select the Make Another Transfer button, if desired, to create another transfer.
Loan Transfers
- On the Account Summary page, tap the Transfer tab on the bottom of the page.
Transfers is only for internal account to account transfers or transfers to other First National customer accounts. External Transfers is found by clicking the hamburger > External Transfers.
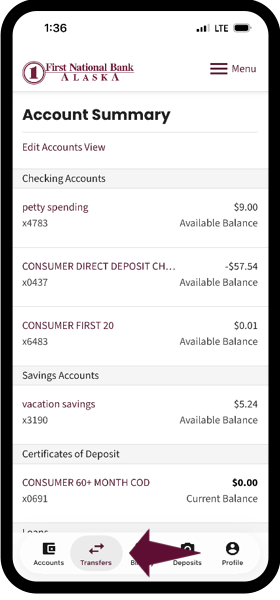
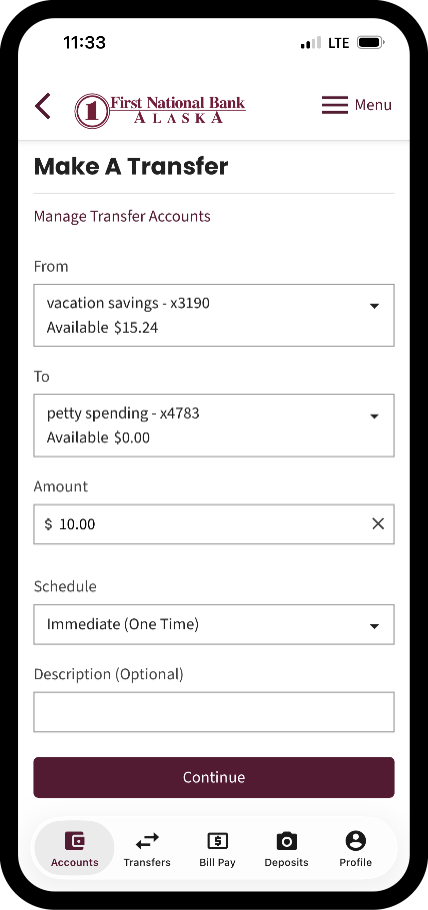
- Select the transfer source account from the From and To dropdown.
- Transfer source accounts:
- Checking
- Savings
- Destination accounts:
- Line of Credit
- Enter the amount in the Amount field
- From the Payment Option dropdown, select one of the following options:
- Payment Due $$$$
- Other Amount
- Principal-Only Payment
- Enter an optional description of the transfer in the Description field, if desired
- Tap the Continue button to complete the transfer.
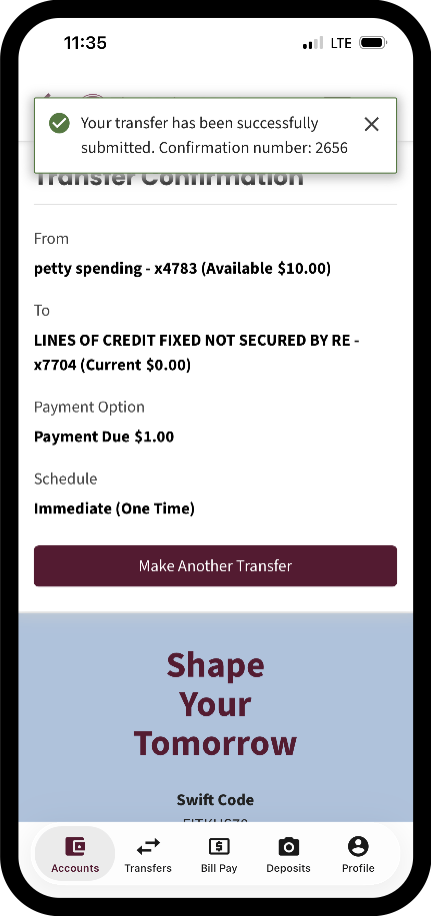
- A confirmation message displays with the unique transfer ID.
Select the Make Another Transfer button, if desired, to create another transfer
Automated Clearing House (ACH)
ACH is fast, efficient and a secure way to send and receive money.
To navigate ACH, follow the steps below:
- On the Account Summary page, click on the hamburger menu at the top right corner of the page.
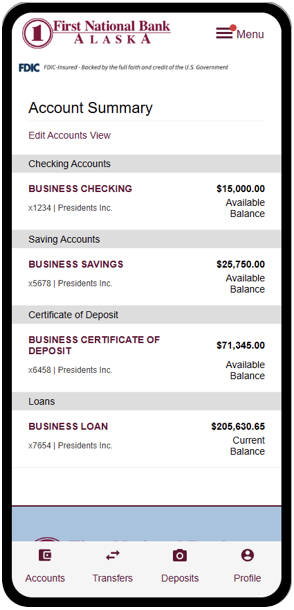
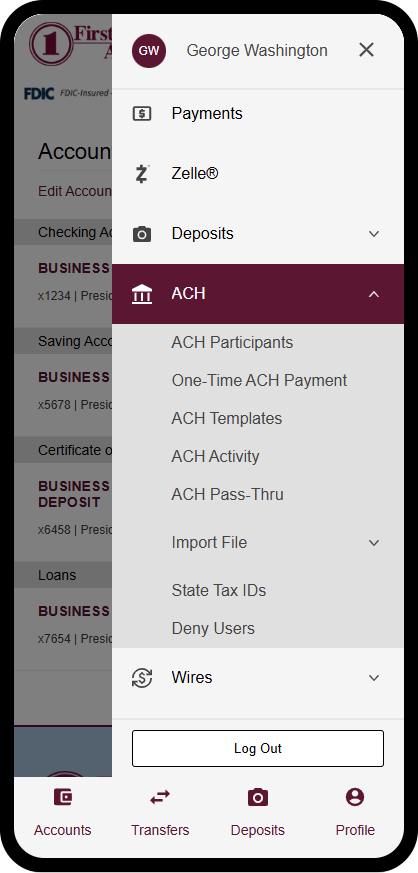
- Select the ACH tab.
You will able be able to set up new payments, review activity and manage participants.
Wires
You can now access wires from the mobile banking app.
- On the Account Summary page, click on the hamburger menu at the top right corner of the page.
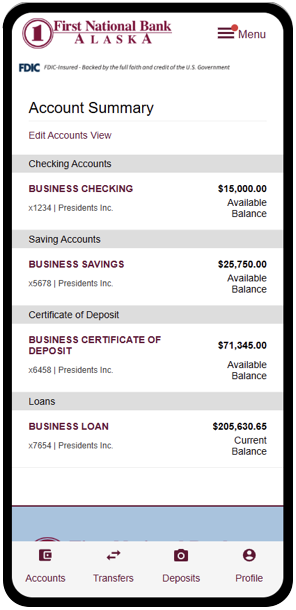
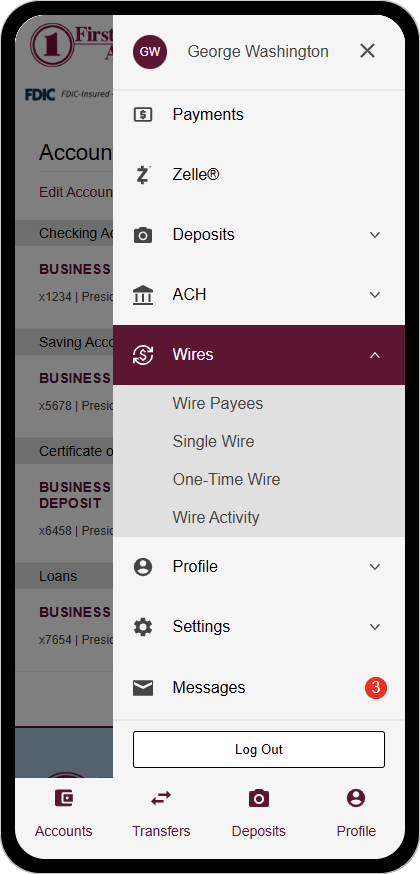
- Select the Wires tab.
You will able be able to set up a wire or review your activity.
Deposit
You can deposit checks and view the deposit in Mobile Banking.
Depositing a Check
To deposit a check, begin by endorsing a check with:
“For Mobile Deposit Only”
- On the Account Summary page, tap the Deposits tab on the bottom of the page.
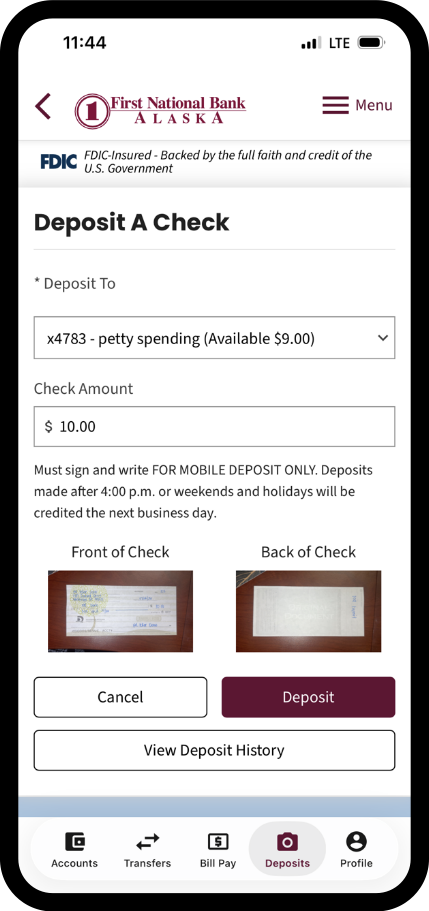
- The Deposit A Check view displays.
- Select the account where the check is being deposited on the Deposit To field.
- Enter the amount listed on the check on the Check Amount field.
- Tap the Front of Check to capture the front image of the check.
- Tap the Back of Check to capture the back of the check with the endorsement “For Mobile Deposit Only”.
- Tap on Deposit to complete the check deposit.
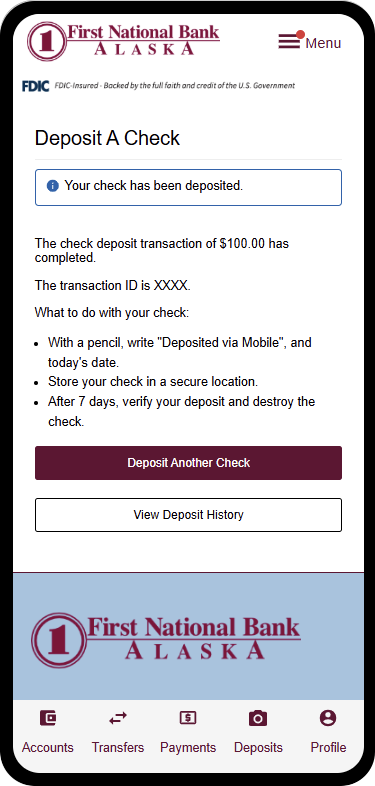
- A confirmation view displays that the check has been deposit.
- You can tap on Deposit Another Check if they have more checks to deposit.
- View Deposit History lists all mobile deposits made to the account
Alerts
Alerts are a convenient way of keeping track of your money while providing additional security for your accounts.
- On the Account Summary page, click the hamburger menu in the top right corner.
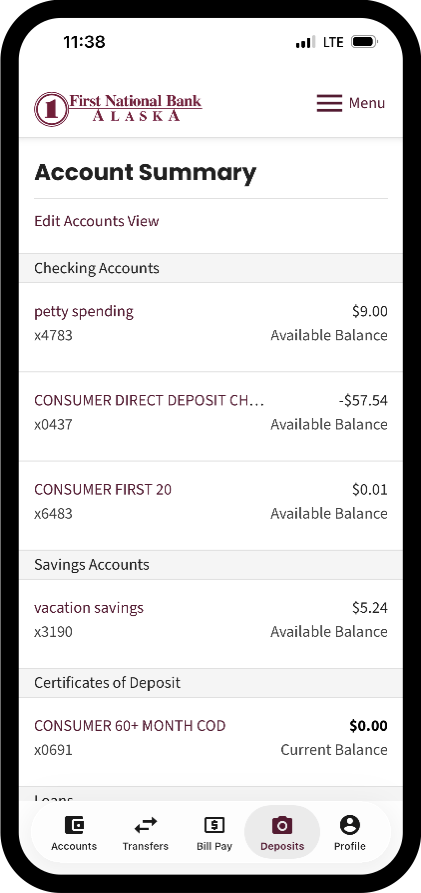
- On the Settings tab, tap on the Account Alerts.
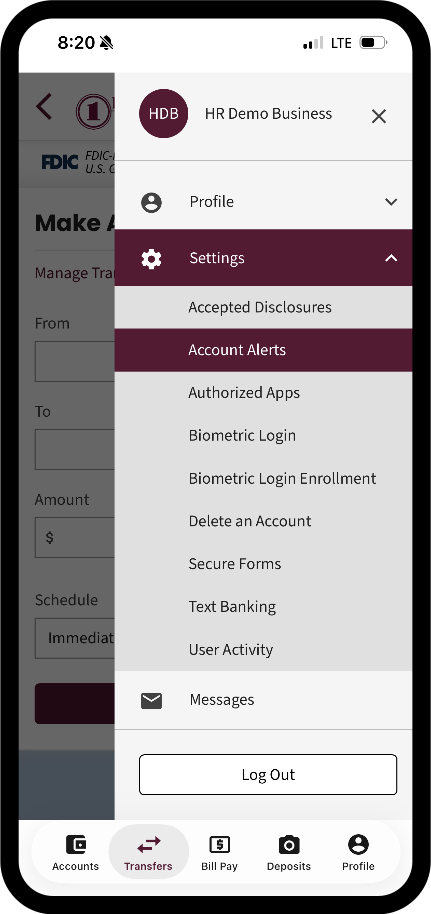
Adding an Email
- Tap on the Notification Settings.
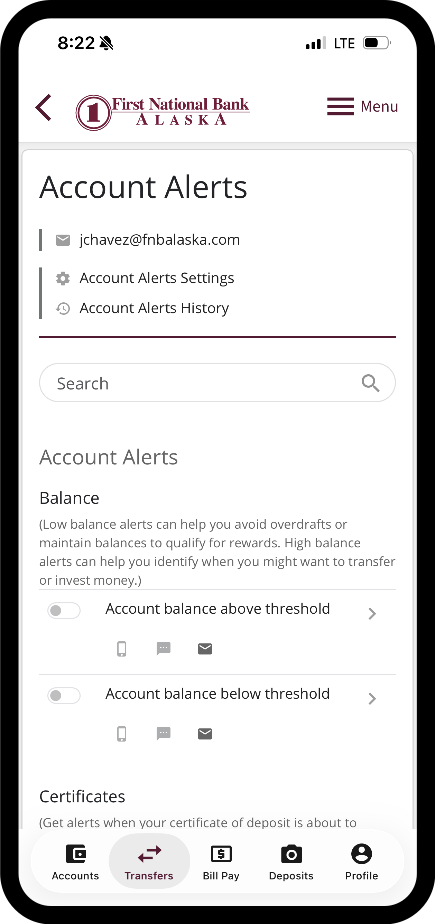
- Notification Settings view allows you to change time zone. As well as add and delete an email for notification delivery.
To add a phone number, tap + Add.
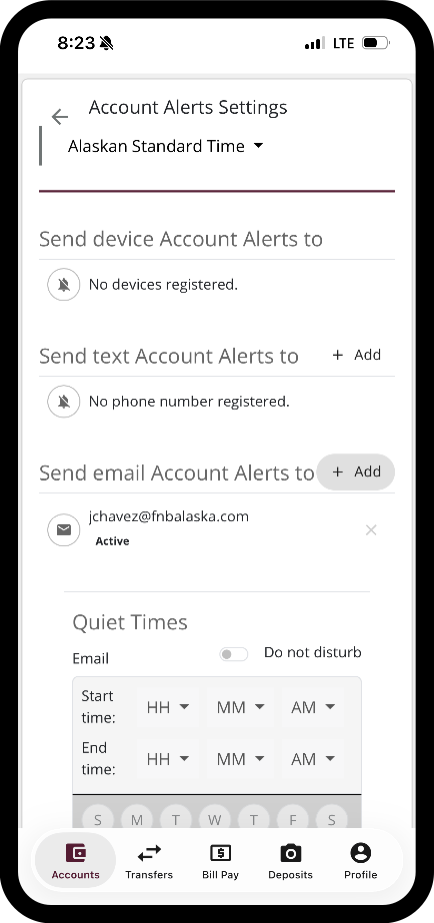
- Enter the phone number you wish to use to receive the notification. Then, tap Next.
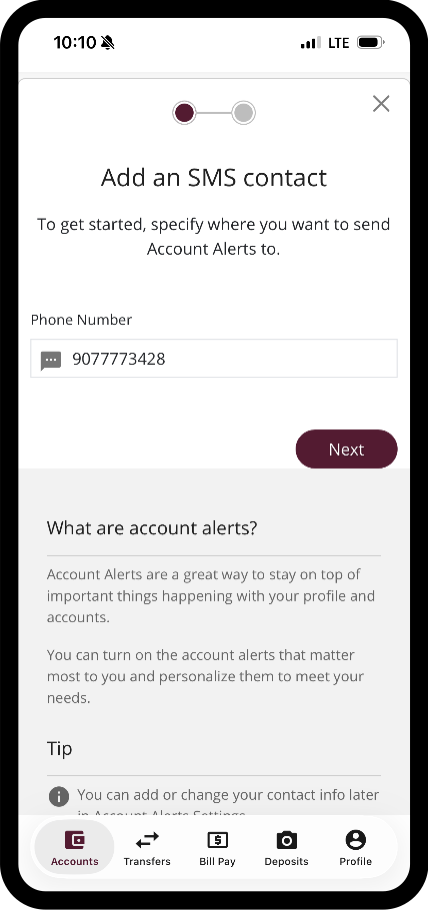
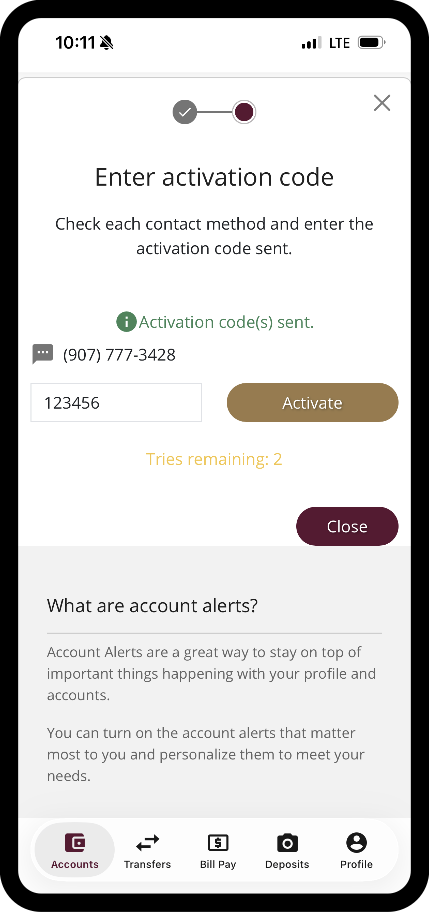
- You will receive a text message with a verification code.
Enter the code once received, then click Activate.
Deleting an Email
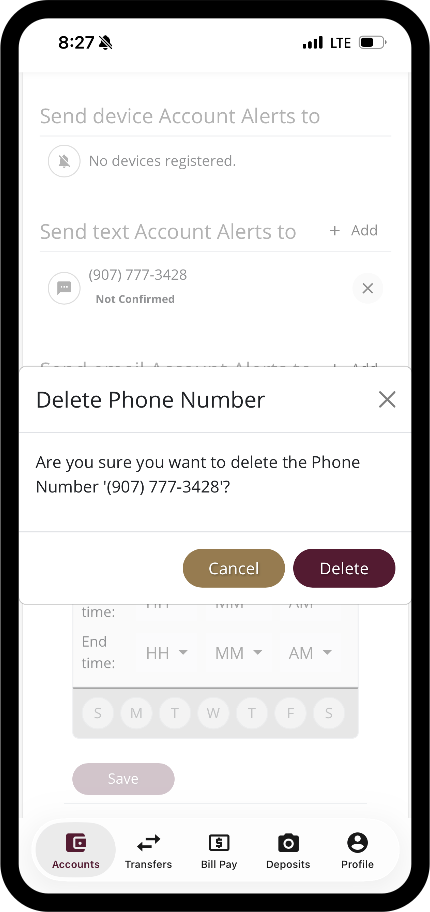
- In the Notifications Settings, tap on the X next to the phone number you wish to remove.
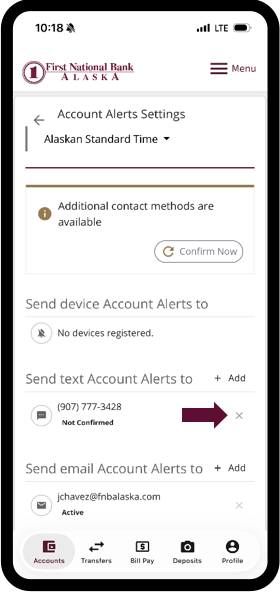
- A pop-up message displays to confirm the action. Tap Cancel to disregard changes, tap Confirm to delete the email.