- Importing ACH Files
- Access ACH Import
- Create a Participant Import Template
- Import CSV
- Editing Participant Import Templates
- Deleting Participant Import Templates
- Import Participants from a CSV File
- Edit ACH Participants
- Delete ACH Participants
- Delete Multiple ACH Participants
- Add Participants
- Import Templates and Participants from a NACHA File
- Import a non-NACHA File and Accessing ACH Import Non-NACHA
- Importing Non-NACHA Files
- Import File – New Template Page
Importing ACH Files
The ACH Import feature allows you to import data to support the use of batch templates. Participant Import CSV files are used to import multiple participants via an import template to reduce the manual effort needed to create them. A Participant record contains the account information for the individuals who will be added to batch templates for collection or payment ACH transactions.
Access ACH Import
- Log in to the Business portal: Enter your User ID and Password, then select the Log In button.
- Add Token.
- Select the ACH tab.
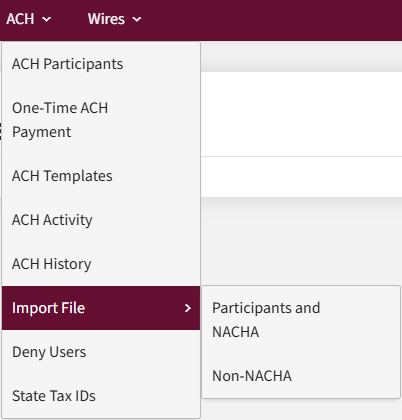
- Select Import File from the menu.
- Select Participant and NACHA from the menu.
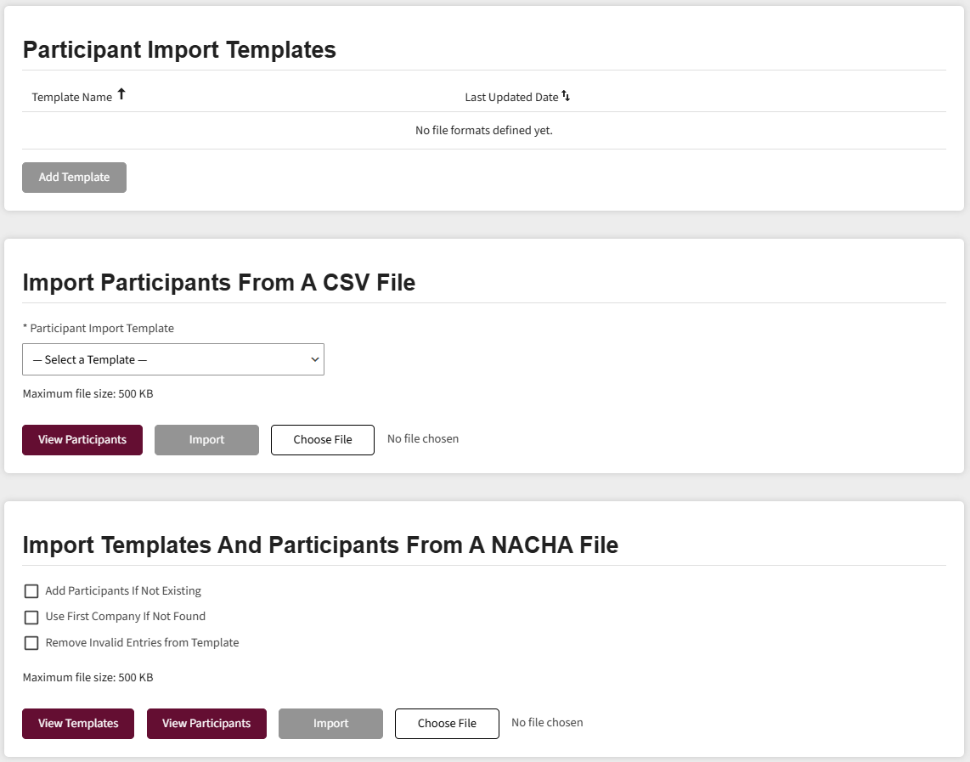
- The screen displays features to manage ACH Imports including Participants Import Templates, Import Participants From a CSV File and Import Templates and Participants from NACHA File.
Create a Participant Import Template
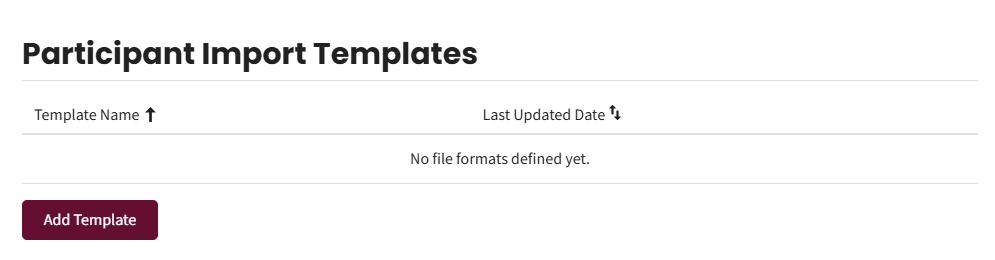
- Select the Add Template button in the Participant Import Template module.
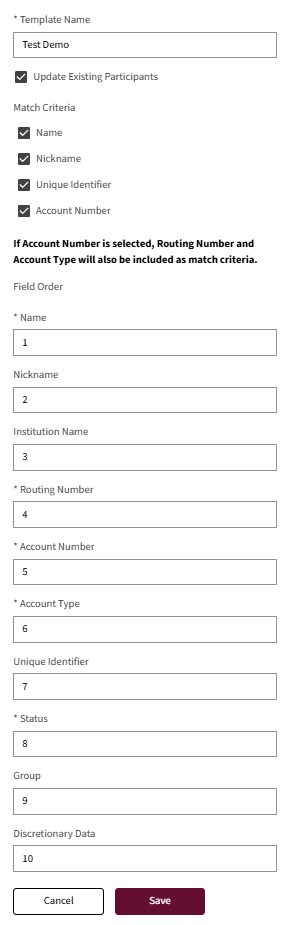
- The Participant Import Templates date fields display. The Match Criteria section represents the fields that must be matched in the CSV import when updating existing participants.
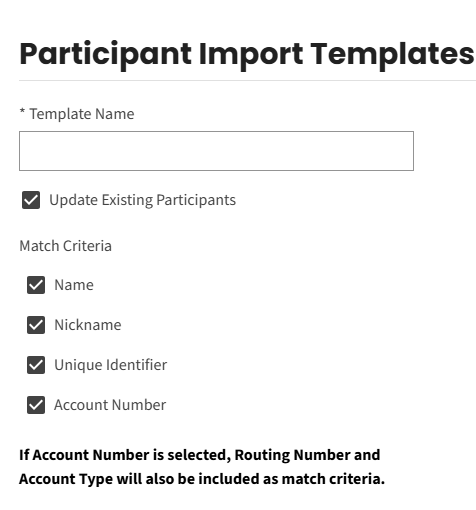
- Uncheck the Update Existing Participants checkbox if you do not want existing participants updated. When you uncheck this box, the Match Criteria checkboxes are no longer available.
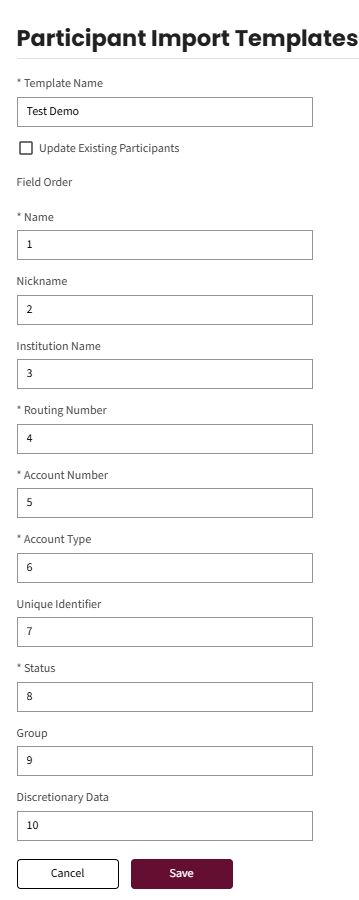
- Number each field according to the order of the data separated by commas in the CSV file.
- Name
- Nickname
- Institution Name
- Routing Number
- Account Number
- Account Type
- Unique Identifier
- Status
- Group
- Discretionary Data
- When defining your template, number each field in the order that the data is ordered in the comma delimited (CSV) file. e.g.
Name, Nickname, Routing Number, Account number, Account Type, Unique Identifier, Status
Name = 1
Nickname = 2
Institution name = (Blank)
Routing Number = 3
Account number = 4
Account Type = 5
Unique Identifier = 6
Status = 7
Group = (Blank)
Discretionary Data = (Blank)
Import CSV
The requirements for the import file are:
| Field Name | Field Requirements | Required/Optional |
| Participant Name | 1 to 22 characters | Required |
| Participant Name | 1 to 40 characters | Required |
| Participant Institution Name | 1 to 22 characters | Required for new participants |
Note: If an institution name is provided, do not include a comma in the name as this will cause the import to fail. For example, “Wells Fargo, NA” will not work, list as “Wells Fargo NA.”
| Participant Routing Number | 9 digits | Required |
| Participant Account Number | 1 to 17 characters | Required |
| Participant Account Type | 1 character | Required |
The following values must be used to represent the appropriate type of account:
0 → Checking
1 → Savings
2 → General Ledger
3 → Loan
| Participant Status | Active or Hold | Required |
| Participant Group | 0 to 40 characters | Optional |
Example records using all available fields
Donald Smith, DS Chck, BANK OF AMERICA N.A., 130009783, 123456789, 0, Ident1, Active, Payroll, T1
Donald Smith, DS Savs, BANK OF AMERICA N.A., 130009783, 098765432, 1, Ident2, Active, Payroll, T1
- Select the Save button when complete.
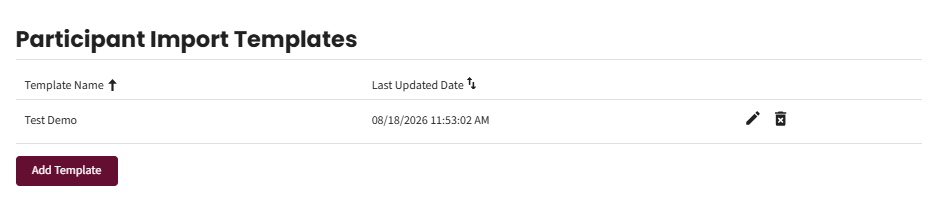
- The Participant Import Templates section will display the created template.
Editing Participant Import Templates
- Select the Pencil icon beside the template to edit a template.
- Update the information in the appropriate data entry field.
- Select the Save button when complete.
Deleting Participant Import Templates
- Select the Trash can icon to delete a Participant Import Template.
- Select OK to confrim the deletion of the template.
- A message confirms the successful deletion of the template.
Import Participants from a CSV File
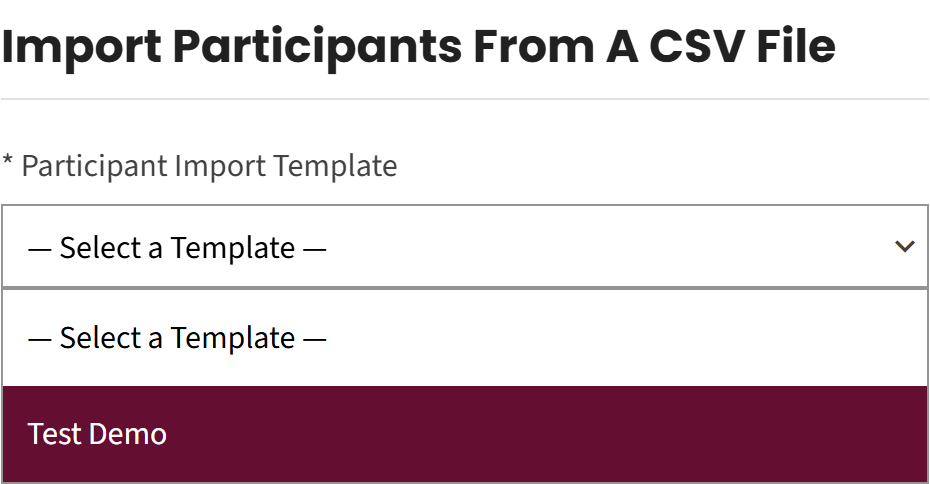
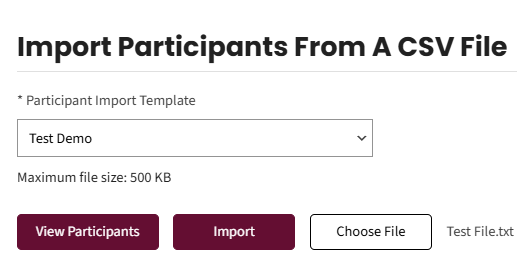
- Select the template to import from the Participant Import Template dropdown menu.
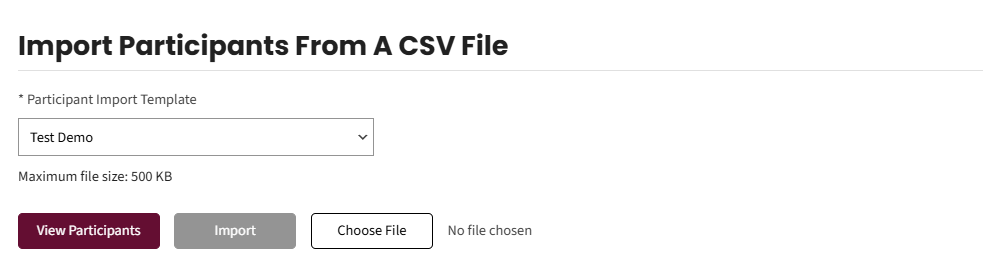
- Select the Choose File button.
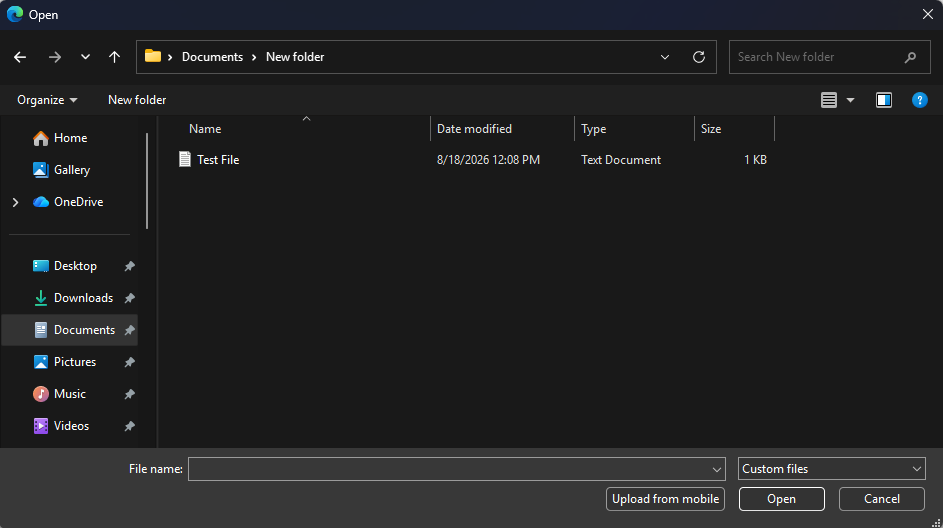
- Find the file on your device and select it. Then select Open.
- The filename will be displayed beside the Choose File button. Select the Import button.
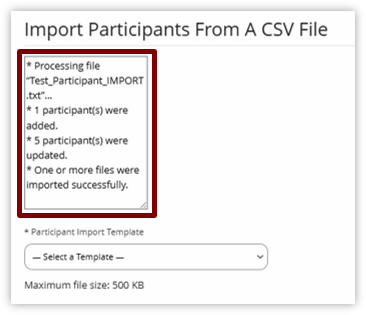
- A confirmation message will be displayed in a dialog box and includes the number of participants imported. If there are errors with the uploaded file, an error message displays.
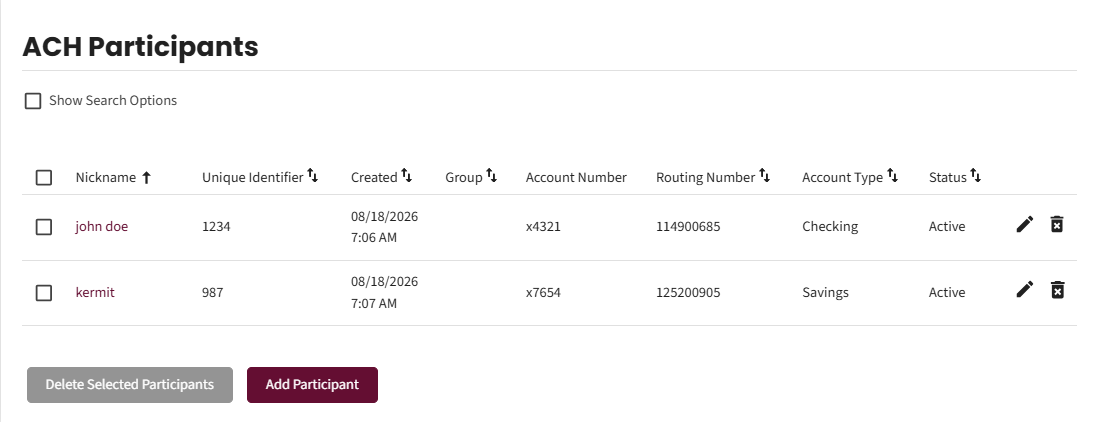
- Select the View Participants button to see participants updated on the ACH Participants view.

- Review the participants list to confirm the addition of new participants. Select the Created column heading to filter the participants by the most recently added participants.
Edit ACH Participants
- Select the Pencil icon beside the participant to edit.
- Edit the information to update in the appropriate field on the Participants Details screen.
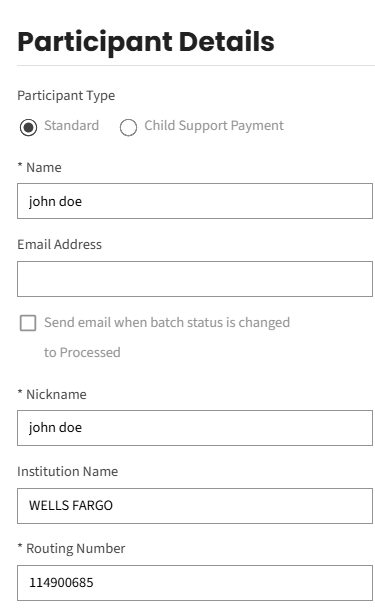
- Select the Save button.

- A confirmation message displays.

Delete ACH Participants
- Select the Trash can icon to delete a participant.
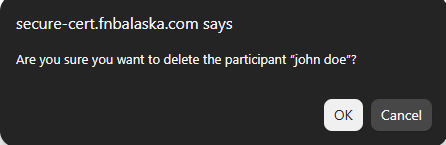
- A pop-up message displays. Select OK to confirm the deletion of this participant.
Delete Multiple ACH Participants
- Select the Checkbox next to each participant to delete.
a. Select one or more participants.
b. Select the Delete Selected Participants button.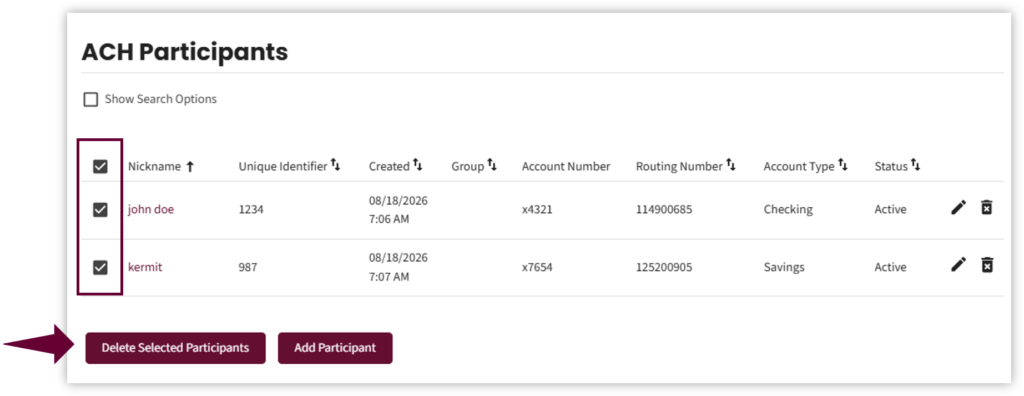
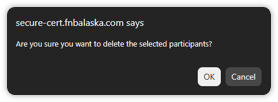
- A message displays asking to confirm the deletion of the selected participants. Select OK to confirm.
- A message displays denying the request to delete a participant that is associated with active distribution batches. It confirms the deletion of the other 2 participants.
Add Participants
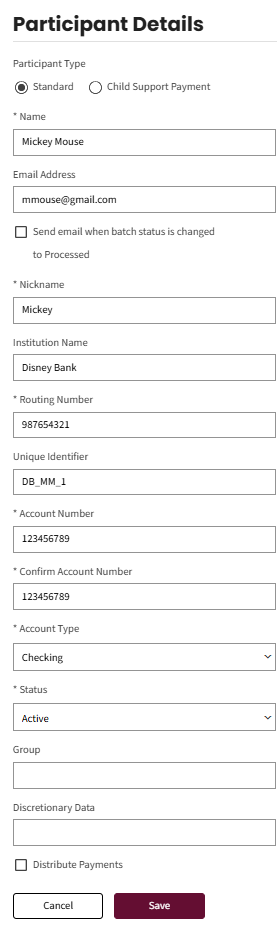
- Select the Add Participants button to add a participant manually.
- Enter all required participant data in the fields provided.
- Select the Save button.
- A confirmation message displays.

Import Templates and Participants from a NACHA File
- Select the ACH tab.
a. Select Import File from the menu.
b. Select Participant and NACHA from the menu.
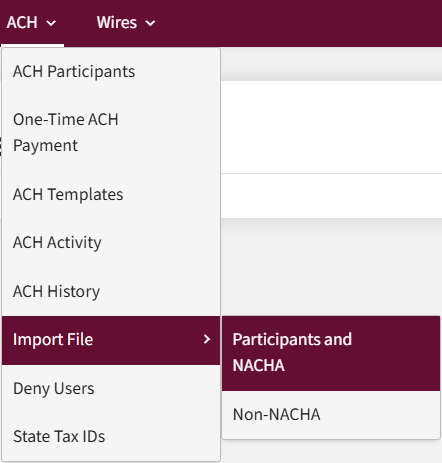
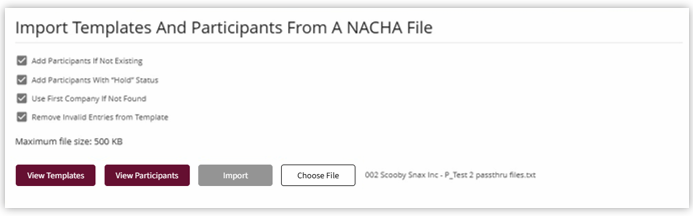
- Find the Import Templates and Participants from a NACHA File section at the bottom of the screen.
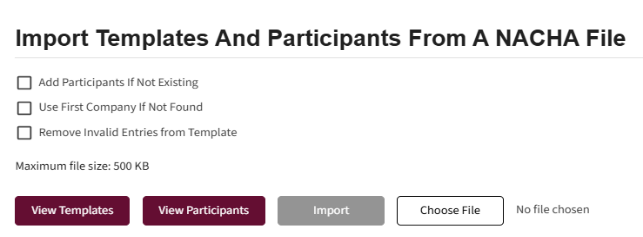
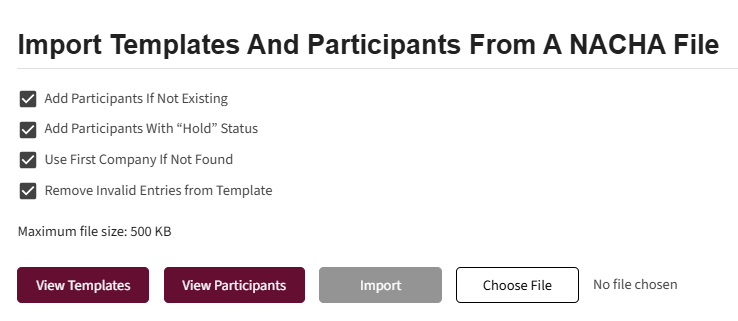
- Select or unselect the checkboxes as needed:
- Select the Add Participants if Not Existing checkbox to add participants that are not included on the file being imported. When this box is checked, the Add Participants with Hold Status checkbox shows below it.
- Select the Add Participants with Hold Status checkbox if you want to include participants in a hold status, if applicable.
- Select the Use First Company If Not Found checkbox to pick up the first company found on an account.
- Select Remove Invalid Entries from Template to delete invalid entries from the import.
- Select the Choose File button.

- Upload the NACHA file from your device.
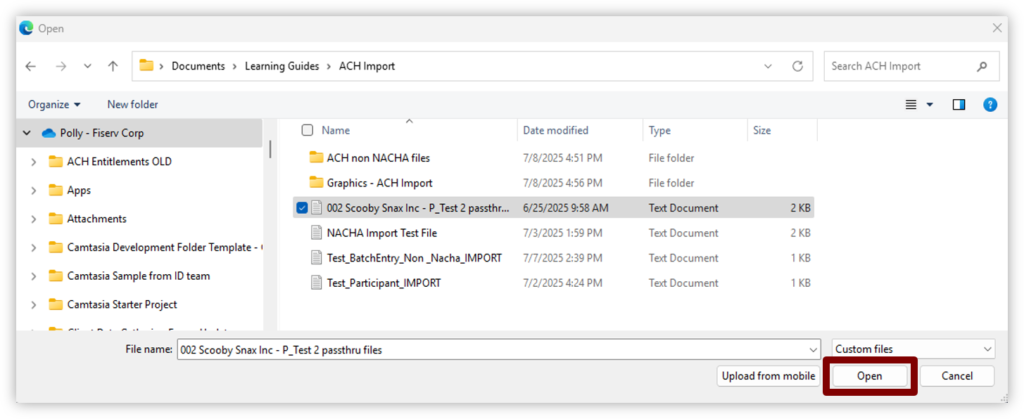
- The file name will display beside the Choose File button.
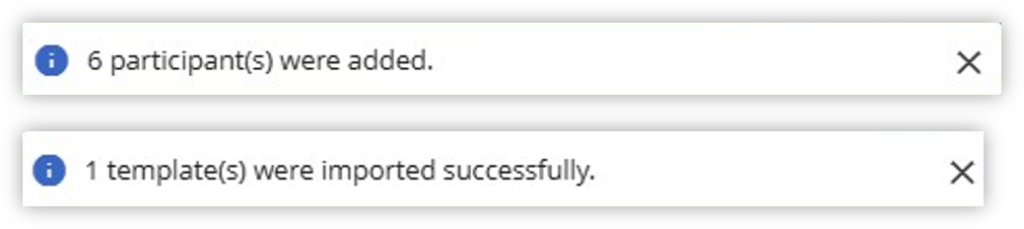
- A success message displays at the top of the screen, confirming the number of participants added and templates imported.
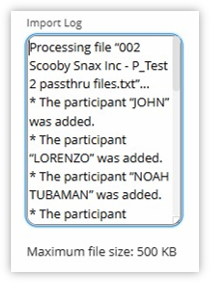
- The dialog box displays information about the imported file in the Import Templates and Participants From a NACHA File section. Scroll down in the dialog box to see all the details, including the batch number, number of participants, and number of templates imported.
- Review any errors reported here. Resolve any applicable errors, then repeat steps 5-9.
- Select View Templates to see all the ACH Templates.
- Select View Participants to see all the ACH Participants.
Import a non-NACHA File and Accessing ACH Import Non-NACHA
- Select the ACH tab.
- Select Import File from the menu.
- Select Participant and NACHA from the menu.
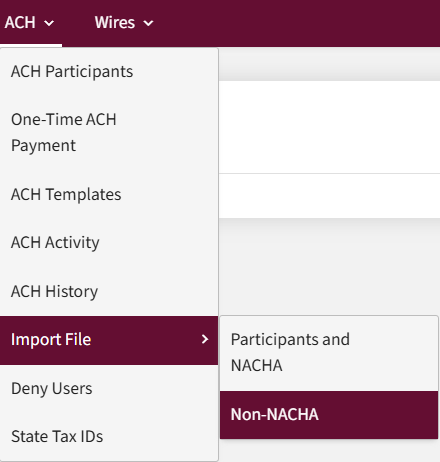
- The Non-NACHA File Import screen displays.
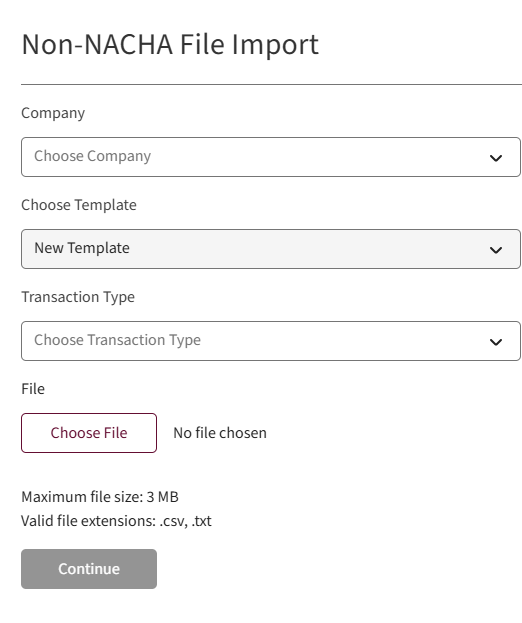
Importing Non-NACHA Files
- Select the company from the Company dropdown list.
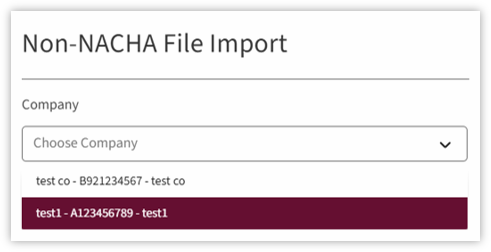
- Select a template from the Choose Template dropdown.
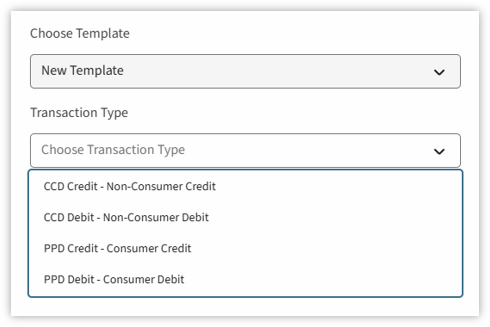
NOTE: New Template is the default. - Select the transaction type from the Transaction Type dropdown menu.
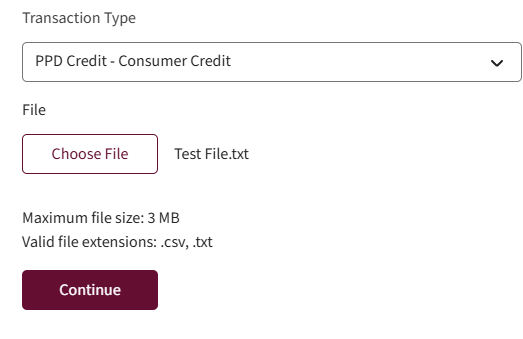
- Select the Choose File button.
- Upload the non-NACHA file from your device.
- The file name will display besides the Choose File button.
- Select the Continue button to import the file.
- The Import File – New Template screen displays.
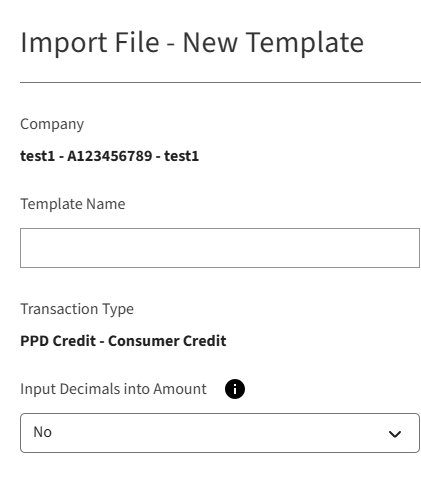
Import File – New Template Page
- Enter the name in the Template Name field.
- Select Yes or No in the Input Decimals into Account field. Select the Information icon more information.
NOTE: Select the i (information icon) beside a data field for more details about the options or data requirements for the designated field. - Select the transaction type from the Transaction Type dropdown menu. If the template is new, the transaction type defaults to what was entered in the previous screen.
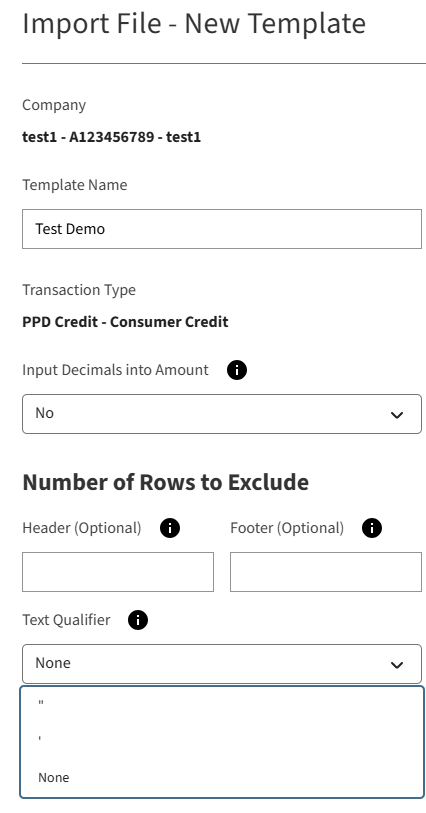
- Select the Header or Footer radio button in the Number of Rows to Exclude section to enter extra rows before the first transaction and after the last transaction in the imported file.
- Select the Text Qualifier dropdown to add a symbol that surrounds a series if characters that identifies the characters as text. Options are Quote, Apostrophe, or None.
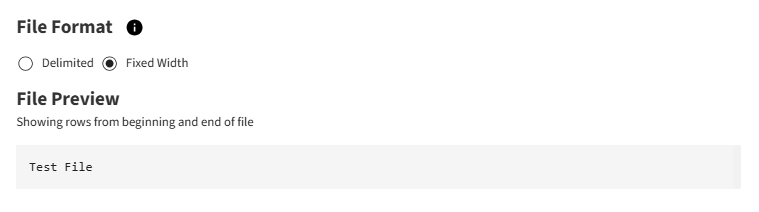
- Select Delimited or Fixed Width in the File Format section to identify the file format being uploaded.
- The File Preview section displays the content from the uploaded file.
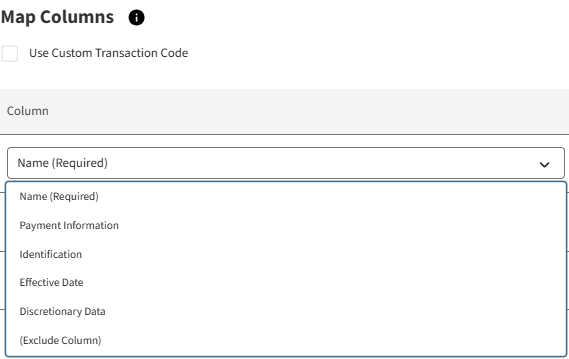
- The Map Columns section allows the user to select the template column order to correspond to the fields in the data file.
- Required fields
- Name
- Amount
- Account Number
- Routing Transaction
- Required fields
- Select the Use Custom Transaction Code checkbox if the file uploaded has a transaction code.
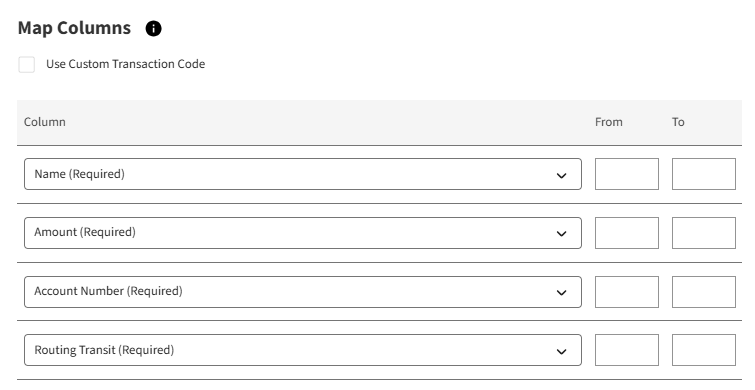
- Map each field with its corresponding data. Select Column 1 dropdown menu and identify its data as Name (Required). Continue mapping each field, identifying the data until all required data is designated to a column. Select Exclude Column for all columns that will not be used.
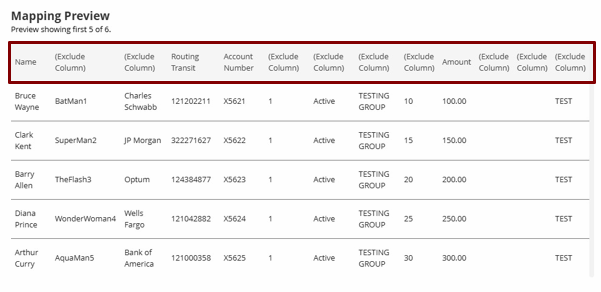
- The Mapping Preview provides an overview of the template columns
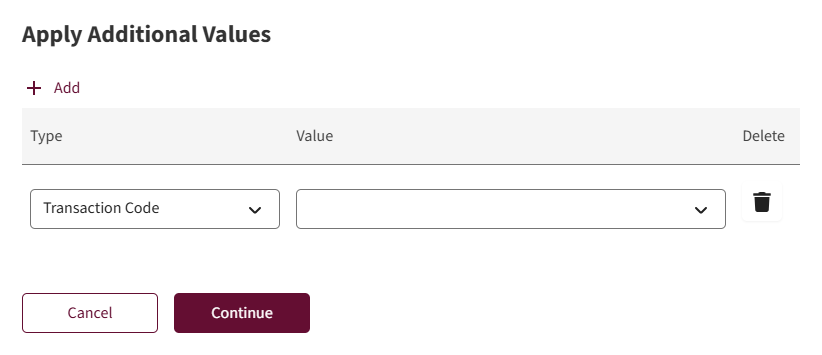
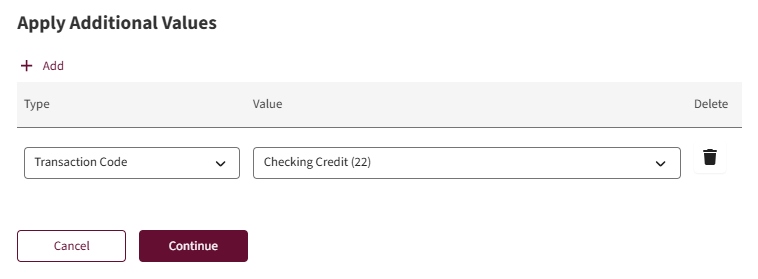
- Select the Add hyperlink to add additional values in the Apply Additional Values section.
- Select a type from the Type dropdown list. Options include Transaction Code, unless Use Custom Transaction Code was checked, Payment Information, Identification and Discretionary Data.
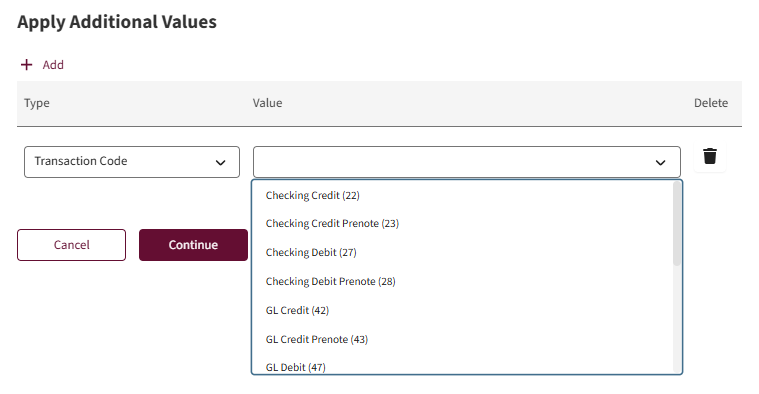
- Enter the value or select the appropriate value from the Value dropdown list.
Select Continue.
- The Import File screen displays with the file name. Select the Import button.
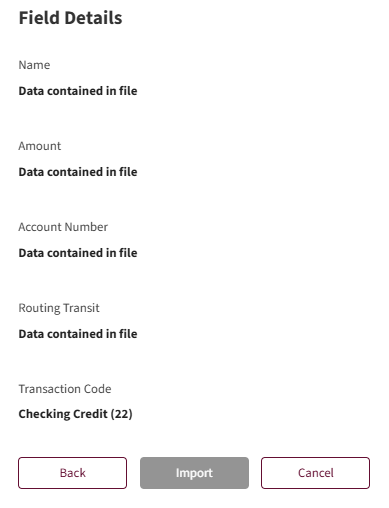
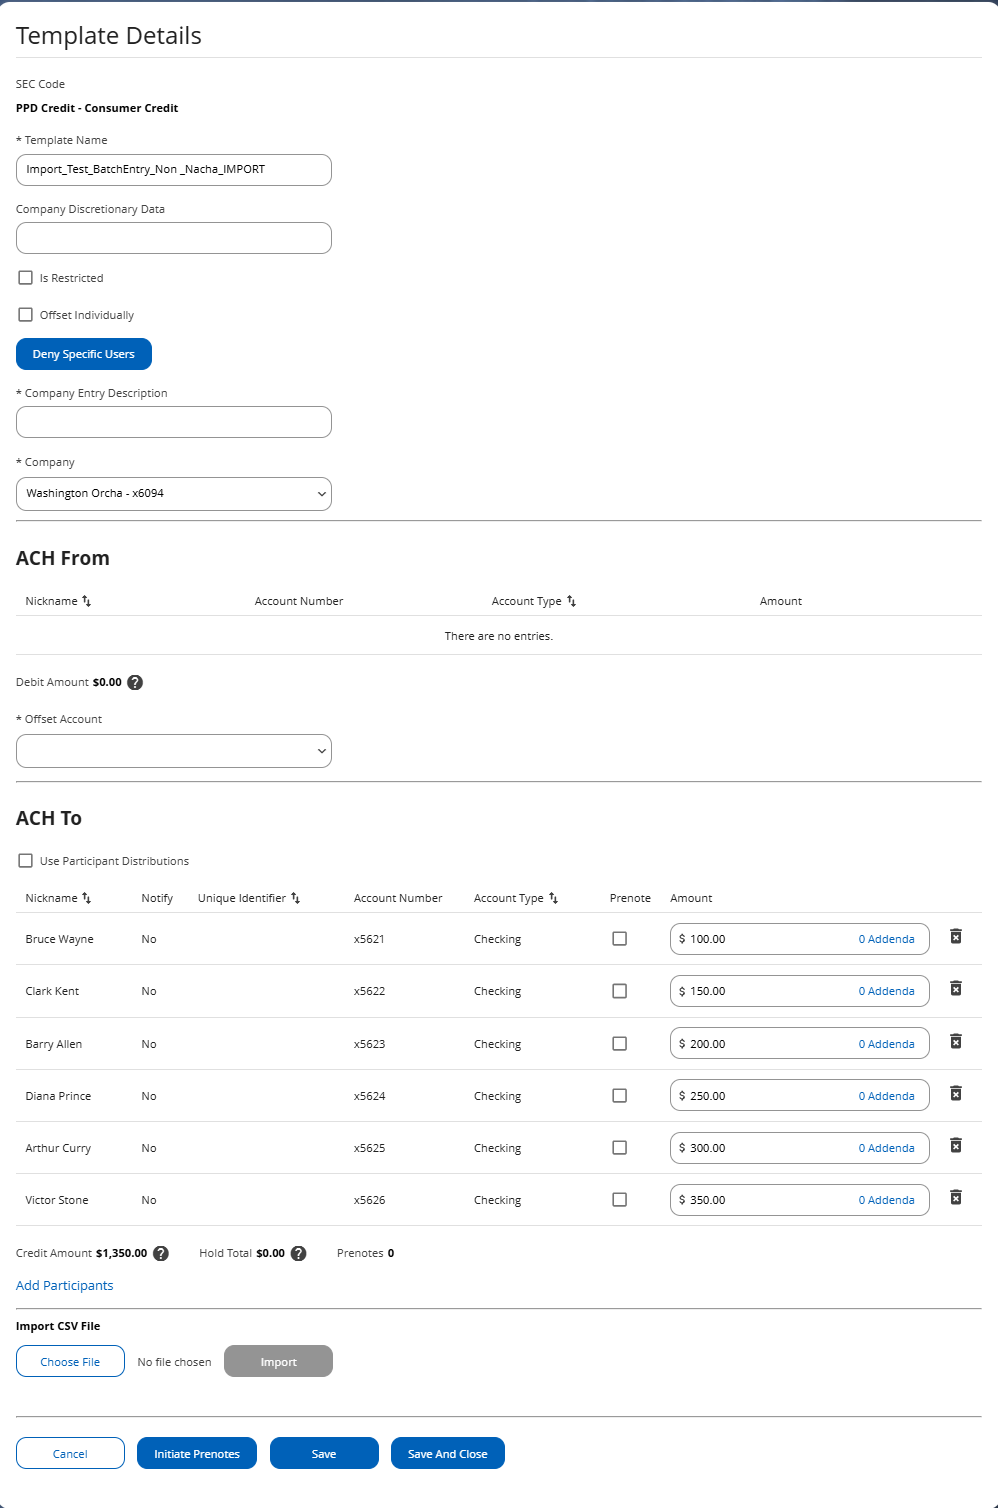
- The Template Details screen displays:
- Click Save and Close.