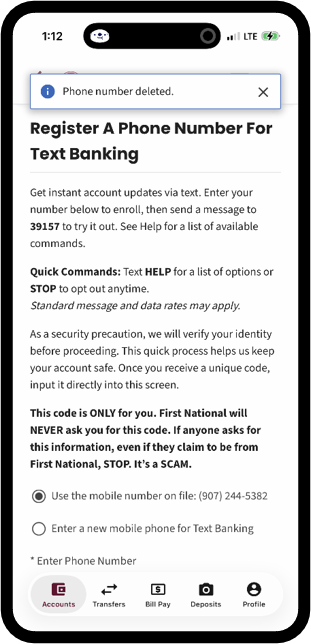
Registering Phone Number (Desktop)
To enroll in Text Banking, complete the phone number registration process.
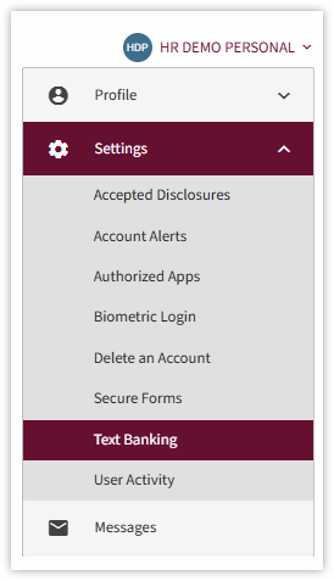
- After logging in to online banking, click on your name in the top-right corner of the screen.
Under Settings, select Text Banking.
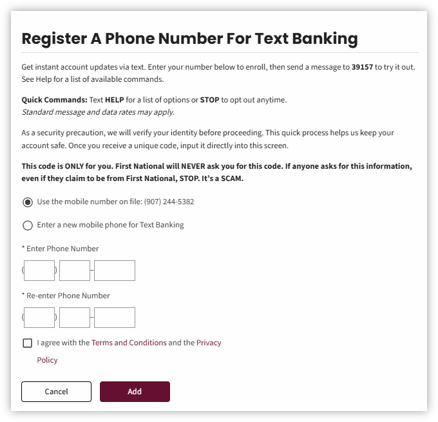
- If no phone number is registered, the Register A Phone Number For Text Banking screen will appear.
Select a current number or enter a new one. Click the checkbox to acknowledge the Terms and Conditions and the Privacy Policy.
Then click Add.
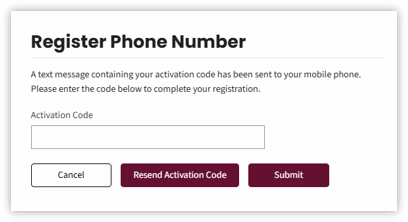
- You will receive a text with an Activation Code.
Once received, enter the code in the field. Then, click Submit.
- Confirmation is displayed that the phone number was added. Click the ‘X’ in the top right of the pop-up to close.

- Mark the Enable box next to the account number(s) to be used through text banking.
- Edit the mobile nicknames as needed and select Make Primary to designate one account as such.
Then, click Submit.
Nicknames are used via text and cannot exceed four characters.
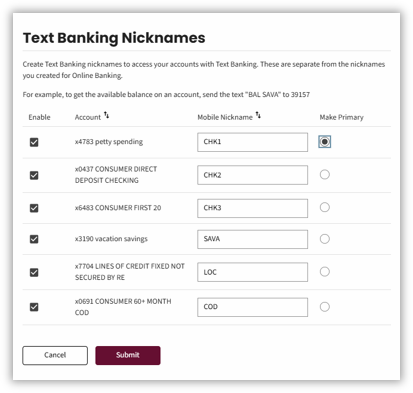
- The screen will display a confirmation message indicated the Text Banking Nickname were updated successfully.

- To add additional phone numbers, click Add Phone and repeat process from steps 2 to 7.
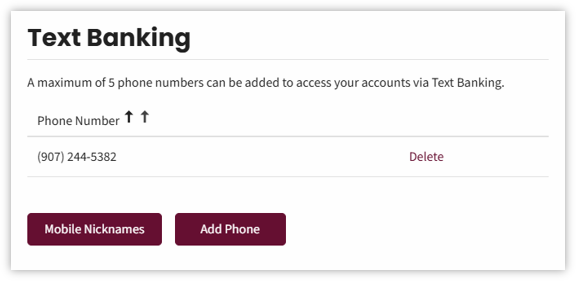
Changing Mobile Nickname
- To change a Mobile Nickname, click on your name.
Under Settings, select Text Banking.
- If you have already registered a phone for Text Banking, you’ll see the Text Banking screen listing any phone numbers currently enrolled.
- Click Mobile Nicknames.
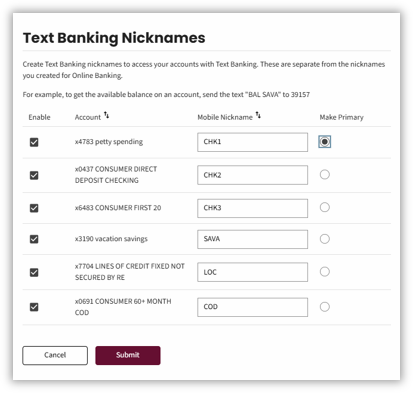
- Enter the desired nicknames (nicknames are limited to four characters).
Click Submit.
Delete Registered Phone Number (Desktop)
- Click your name in the top-right corner of the screen.
Under Settings, select Text Banking.
- On the Text Banking screen, click Delete next to the phone number being removed.
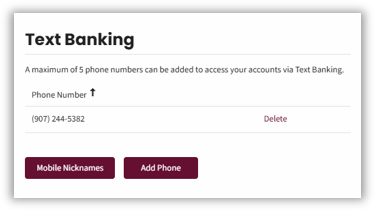
- A pop-up message appears prompting you to confirm action.
Click OK to confirm.
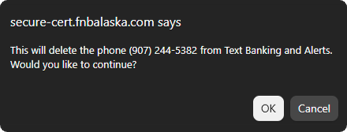
- A pop-up will display that a phone number has been deleted.

Text Banking Requests (Desktop)
Text Banking supports the following commands. Note: The commands are not case sensitive.
Text “bal” or “b” – returns the balance on the primary checking or savings account. When you create short nicknames for text banking, you can use the short nicknames with the balance command to find the balance of any account:
- bal <nickname>
For example, if a you gave a nickname to your checking account as chk, you could text:- bal chk – to get the balance information.
Texting the command
- bal all – will return the available balance of all accounts.
Text “hist” or “h” – returns history with the last 5 transactions of the primary account. The short nicknames can be applied to the command as:
- hist <nickname>
For example, if you gave a nickname of chk to your checking account, you could use:- hist chk
Text “more” or “m” – the more command is used with the hist command. When you request the history of an account by texting hist, it returns with the last 5 transactions. To get the next 5 transactions, simply text more. Texting more again will return the next 5 transactions and so on until there are no additional transactions available on the account.
- Text “nick” – returns a list of all your account nicknames.
- Text “help” – returns a list of all commands.
- Text “stop” – this command will unsubscribe the phone from Text Banking.
- Text “trans” or “T” – Transfer: Request a transfer between accounts.
- Transfer format: TRANS <from acct> <to acct>
Registering Phone Number (Mobile)
To enroll in Text Banking, complete the phone number registration process.
- After logging in to the mobile app, tap the hamburger menu on the top right of the screen.
Tap Settings, then select Text Banking.
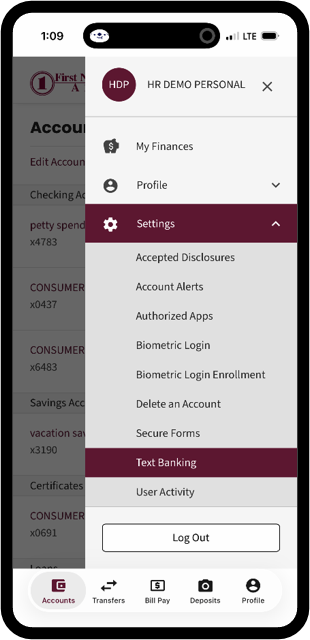
- If no phone number is registered, the Register A Phone Number For Text Banking screen will appear.
Enter the phone number you wish to use for Text Banking.
Tap the checkbox to acknowledge the Terms and Conditions and the Privacy Policy.
Then tap Add.
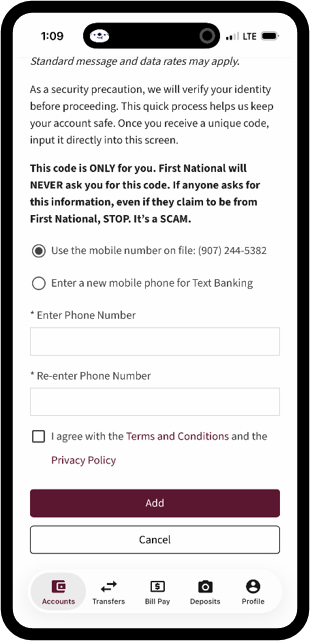
- A text message with the Activation Code will be sent to the phone number provided
Enter the code in the Activation Code field. Then, tap Submit.
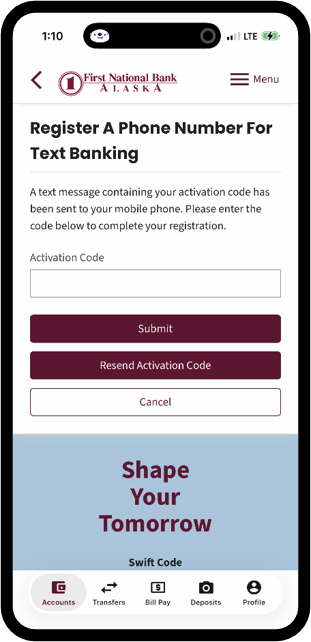
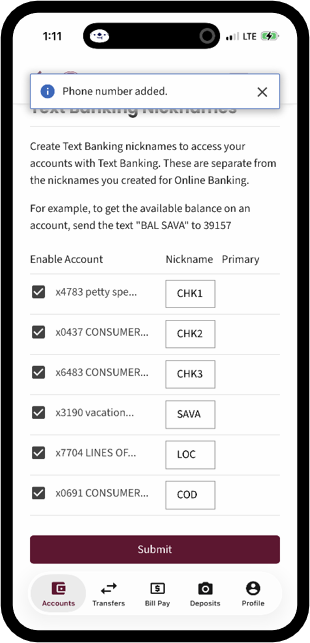
- A confirmation displays that the phone number has been added. Tap ‘X’ on the right corner of the pop-up to close.
- Mark the Enable box next to the account number(s) to be used through text banking.
- Create a mobile nickname for the account (four-character limit).
Then, tap Submit.
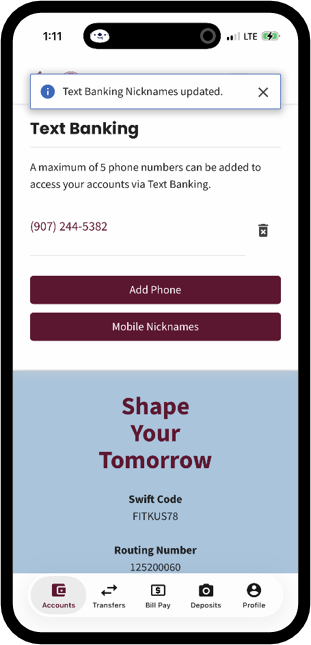
- A confirmation of the Text Banking Nickname being updated is received. Tap the ‘X’ on the right corner to close the pop-up.
- To add additional phone numbers, tap Add Phone and repeat process from steps 2 to 7.
Delete Registered Phone Number (mobile)
- On the homepage, tap on the hamburger menu on the top right of the screen.
Under Settings, then select Text Banking.
- If no phone number is registered, the Register A Phone Number For Text Banking screen will appear.
On the Text Banking page, tap the Trash Can icon next to the number being removed.
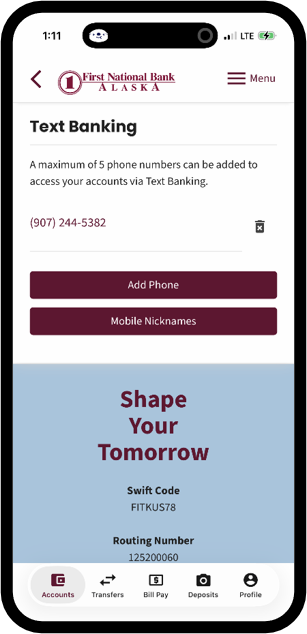
- A pop-up message appears prompting to confirm action.
Click OK to confirm.
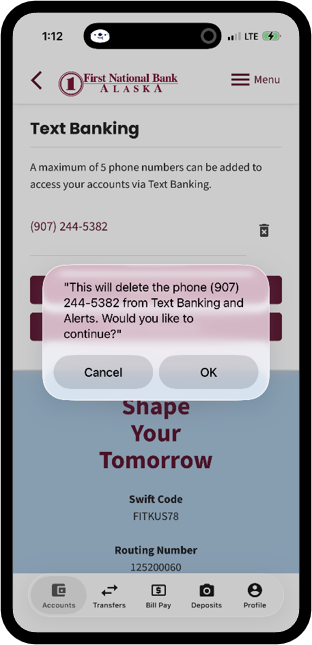
- A pop-up will display that a phone number has been deleted.