What is Zelle?
Zelle® is a fast, safe and convenient way to send money directly between bank accounts in the U.S., typically within minutes. You should only use Zelle with people you know and trust. Zelle offers the following features:
- Split a Bill
- Send Money
- Request Money

Send
- Log in to online banking. Enter User ID and Password, then select the Log In button.
- Select the Zelle® menu. The Zelle® view will display.

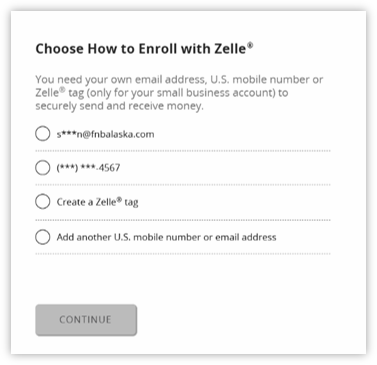
- Businesses will need to select an email address or a U.S. phone number to enroll in Zelle,
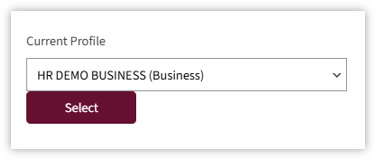
- Once enrolled, businesses with linked profiles are given the dropdown selection to identify which business they are sending money on behalf of.
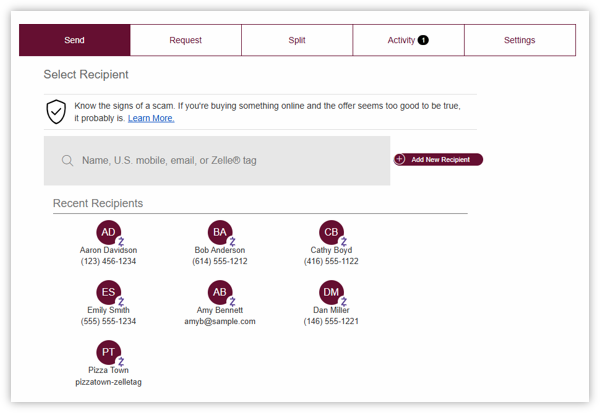
- Select the Send tab to send payments. Select a recipient or search for one. The recipient will receive the notice of deposit, which will be sent to either a mobile phone number or email address.
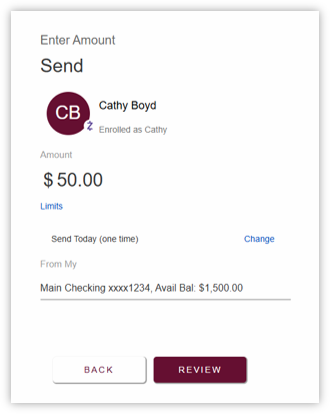
- Input the amount of money you wish to send. Then, click Review.

NOTE: Prior to submitting the transfer, users can change the funding account, adjust the payment amount and update the payment frequency to meet their needs.
- Review the payment details and add a message on the Reason (Optional) field, if needed. Click Send to complete the payment.
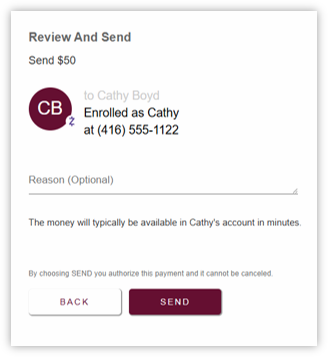
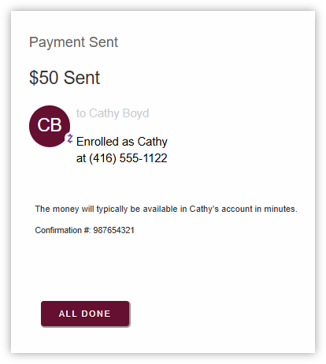
- A confirmation that the payment is sent is displayed.
Requesting Payment
To request money with Zelle:
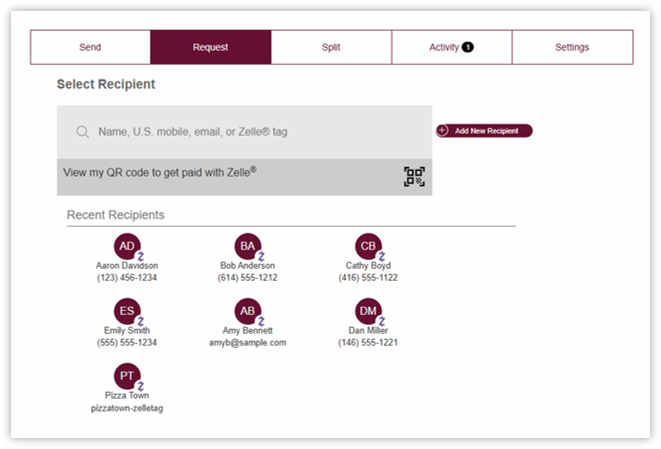
- Select the Request Tab to request payments. Select a recipient or search for one. The recipient will receive the notice of withdrawal, which will be sent to either a mobile phone number or email address.
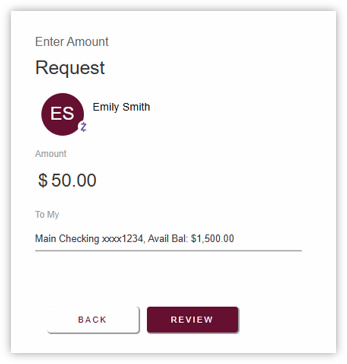
- Input the amount of money you wishs to request. Then, click Review.
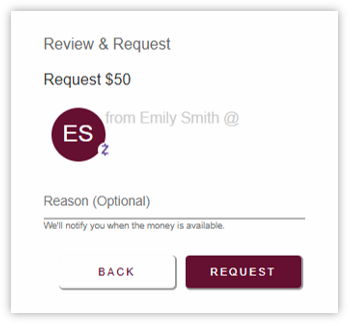
- Review the payment detail and add a message on the Reason (Optional) field, if needed. Click Request to complete the payment.
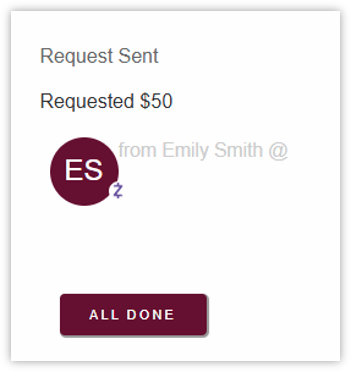
- A confirmation that the payment is sent is displayed.
Note: If the recipient is already enrolled with Zelle, the payment is typically delivered automatically. If they are not enrolled, they will receive a text message or email with instructions to enroll and accept the payment. Once enrolled, the funds will be deposited into their selected account.
Split a Bill
To request money with Zelle:
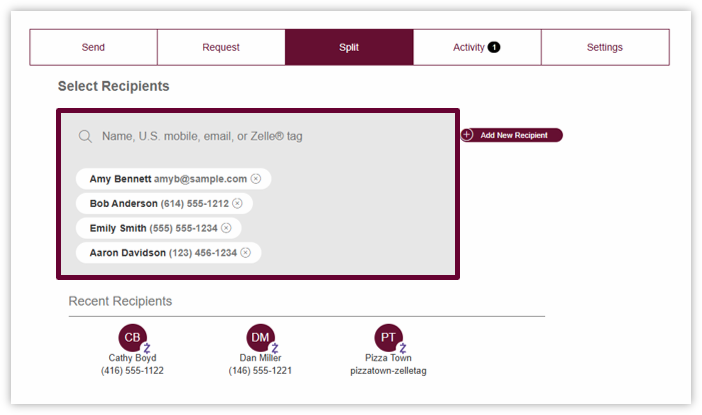
- Click on the Split Tab at the top. Select the individuals to request payment from. The individual will receive a notice of the split payment request.
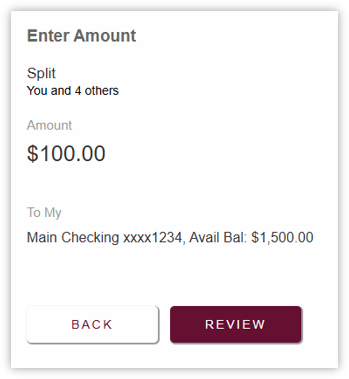
- Next, enter the amount to request from each individual by clicking on Enter Amount
- Enter the total bill amount. Then click Review.
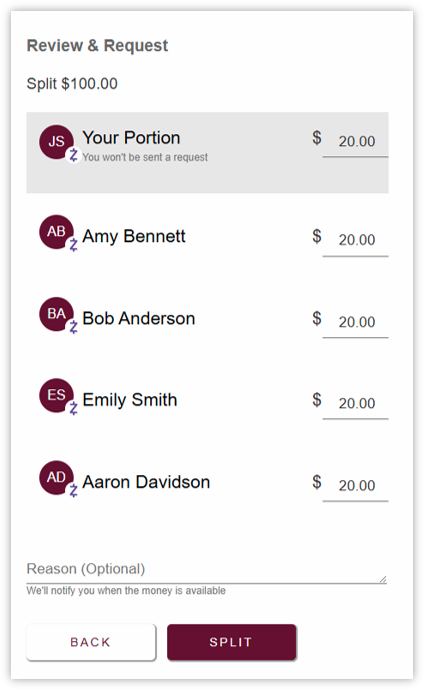
- The Review & Request screen will display. Edit each payment as needed.
Add a message on the Reason (Optional) field, if needed.
Click Split to send the request.
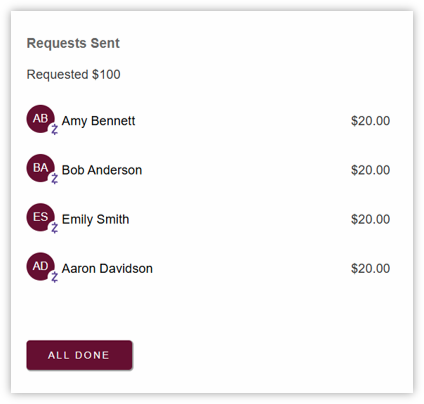
- The Request Sent view will display showing that the split payment request has been sent.
Click All Done.
Zelle Activity
The Activity page displays your Zelle payment history, including payments that have been sent, received, are pending or have been cancelled.
Instructions:
- Select Activity from the Zelle menu
- Review the list of recent Zelle transactions
- Select a transaction to view additional details, such as:
- Recipient or sender
- Payment amount
- Date and time
- Payment status
- Memo (if provided)
- If a payment is pending, review the status to determine whether the recipient has enrolled with Zelle
- Return to the Activity list when finished.
Note: Payments sent to recipients who have not enrolled with Zelle will remain pending until the recipient completes enrollment or the payment expires.
Zelle Settings
The Settings page allows you to manage the contact information and accounts associated with your Zelle profile.
Instructions
- Select Settings from the Zelle menu.
- Review the registered email address(es) and mobile phone number(s).
- Add or remove an email address or mobile number, if needed.
- Select the deposit account associated with each enrolled contact method.
- Save any changes before exiting the page.
NOTE: Each email address and mobile phone number can only be enrolled with one financial institution at a time.

TIP: Verify that the selected deposit account is the account where incoming Zelle payments should be received.