Entering Entitlements for a New Business
Entitlements are permissions that establish what a business or a user is allowed to do. Entitlements are also set up at the user level to allow each user to have only the permissions needed to do their jobs for the business. Business Administrators are given the same entitlements as the business itself. Any additional user setup by the Business Administrator can have individualized entitlements based on the needs of the business.
First National enters entitlements for a new business to Online Banking as part of the Business Registration process once proper documentation has been obtained. Personal bankers (PB) and higher will register businesses completing the Business Online Banking Enrollment form (Single entity basic enrollment) and provide credentials to the named Business Administrator. To simplify this process, a Service Package (a predefined set of business user entitlements and permissions) has been created and can be applied during registration. This will save time and errors by having the Service Package as a template.
To register a business for online banking:
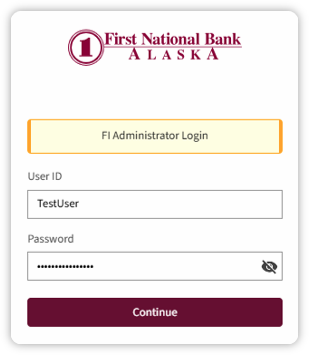
- Log in to the Admin Portal: Enter the User ID and Password, and then click the Log In button.
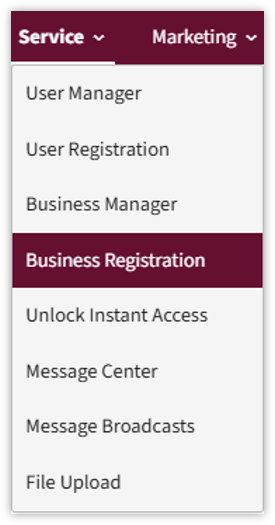
- Select the Service tab, then select Business Registration from the menu.
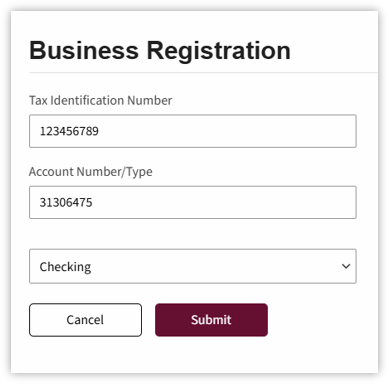
- The Business Registration screen will display.
- Enter the business Tax Identification Number (TIN) in the Tax Identification Number field. For Sole proprietor or single member LLCs that use the owner’s Social Security Number, enter the SSN.
- Enter the business’ Account number/Type
- Select Submit
- The Business Registration screen displays. Confirm the information matches the business you are working with.
Select the Business button.
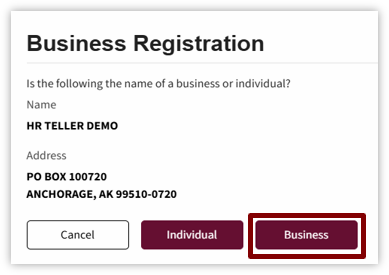
- The pop-up window will confirm that the business has been added.
- The screen will prompt you to select a Service Package or entitlements for the business.
A Service Package has been created for PB and higher to be used when onboarding a basic business package. These set ups are reviewed by Review Unit the next business day. - The screen will prompt you to select the entitlements for this business.

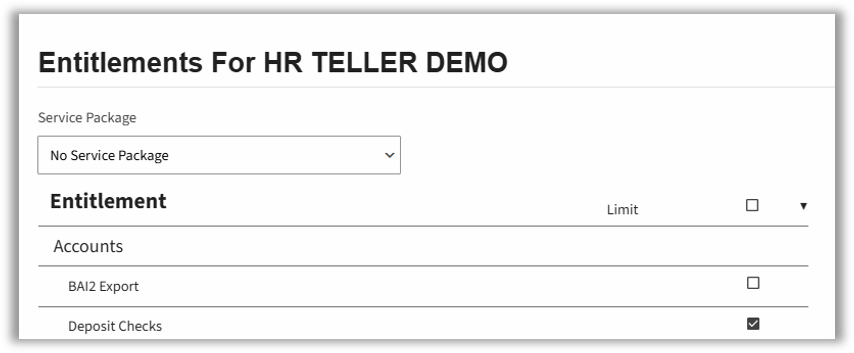
Entitlements Process Overview
Setting up entitlements for a business:
Select the checkbox/column of each entitlement the business has indicated on their contract.
Unselect the checkbox of any entitlement not needed.
Enter the appropriate amounts in limit fields according to the online banking contract completed by the business.
Any entitlements that have changed will turn yellow.
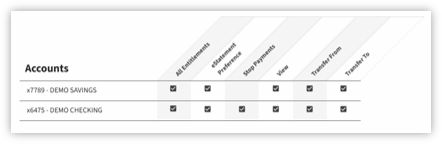
When you have finished editing the entitlements, scroll down to the Accounts section. Select or deselect the appropriate features for each account based on the contract.
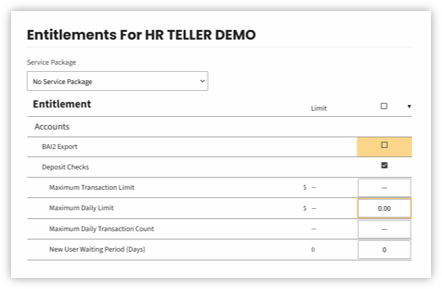
Scroll to the bottom of the screen. Click the Save button on the bottom of the screen.
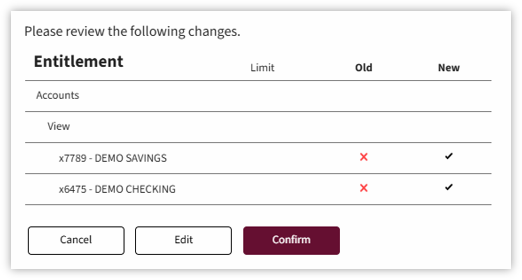
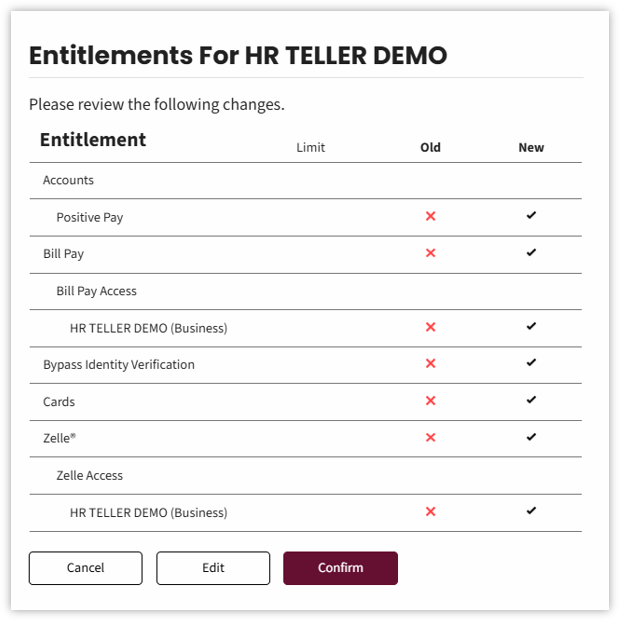
A review screen displays the old and new entitlements for your review.
- Select Cancel to abandon the changes.
- Select Edit to change something.
- Select Confirm to accept the changes.
A confirmation screen will display.

Entitlements – Line-by-Line Explanation
This section will explain each entitlement. The Entitlement screen is divided into the sections: Account, ACH, Bill Pay, Bypass Identity Verification, Cards, Entitlements, SecureNow Tokens, Transfers, Wires and Zelle®.
BAI2 Export
Allows a business to export account and transaction data into a BAI2 formatted file. When allowed, the business can import the file into a third-party system outside the bank.
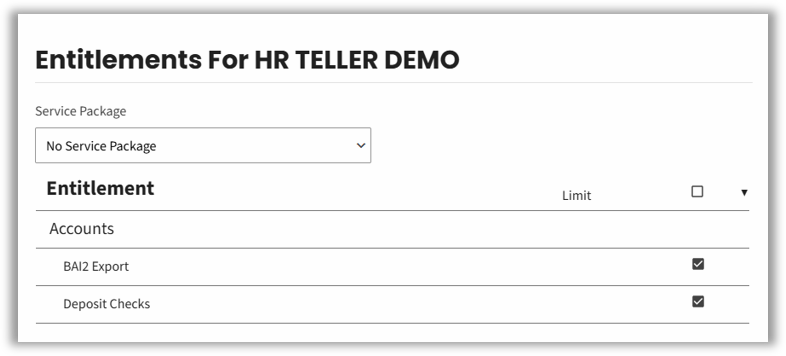

Example: A business maintains accounts and processes transactions at several banks. The BAI2 export allows the business to consolidate BAI2 extract data from multiple banks.
Deposit Checks
Allows business to deposit checks via mobile capture. This is a default setting business. When checked, additional data fields display requesting for limits to be entered.
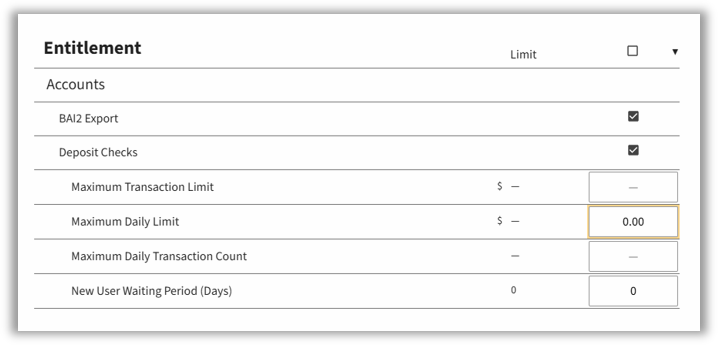
A dash in any entry field indicates that the amount has not been limited by the bank.
Enter the Maximum Transaction Limit – Maximum limit per check
Enter the Maximum Daily Limit – Maximum daily deposit limit – this is the limit First National Bank Alaska uses. Default is $10,000 for business customers.
Enter the Maximum Daily Transaction Count. Maximum number of checks that can be deposited in a day.
New User Waiting Period – This field is used to prevent a business from using the service for the number of entered (0-30). This feature is not used by First National.
Merchant Source Capture
Select the box beside Merchant Source Capture to allow the business to make electronic deposits of checks by running them through a tabletop scanner. When checked, other fields open where the limits can be set.
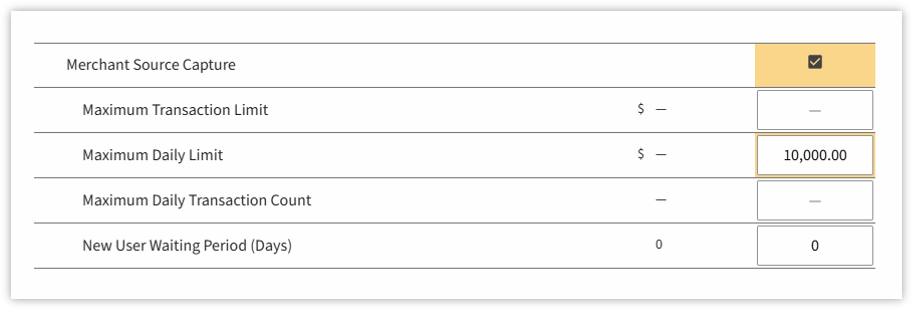
Enter the Maximum Transaction Limit– Maximum limit for one transaction by Merchant Source Capture.
Enter the Maximum Daily Limit– Maximum amount of all Merchant Source Capture in one day.
Enter the Maximum Daily Transaction Count. Number of checks that can be deposited in one day by Merchant Source Capture.
Enter a value New User Waiting Period– This field is used to prevent a business from using the service for the number of days entered (0-30). This feature is not used by First National Bank Alaska.
Positive Pay
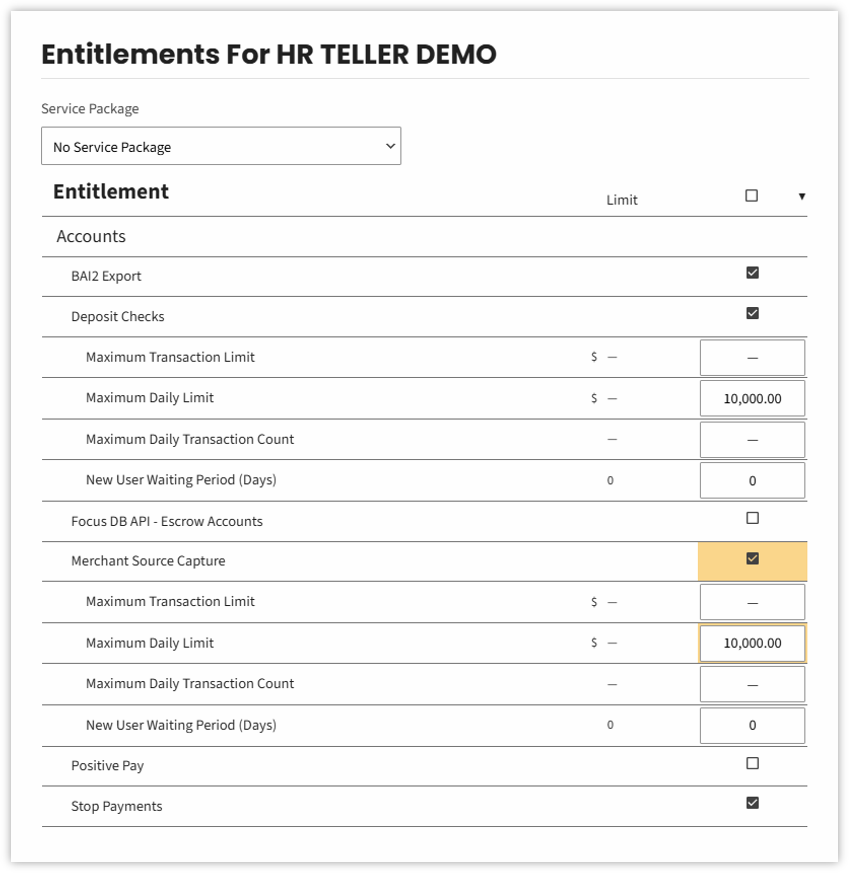
Check the box beside Positive Pay to enable the business to use Positive Pay. The entitlement will give the business access to the positive pay management screens which will interact with the transaction authorization system (TAS).
The entitlement assigned depends on the Positive Pay application. If the business uses ACH Alerts, assign the Risk Management Services entitlement. If the business uses Centrix, assign the Positive Pay Centrix SSO entitlement.
Stop Payments
Check the box beside Stop Payments if this business needs to make stop payments. This is a default setting for all businesses. An additional Stop Payment entitlement is also available at the user level.
Bill Pay
Select Bill Pay if the business will be able to pay bills in the system. Selecting Bill Pay gives the business access to the bill payment’s menu. At the user level, appropriate permissions would still be required.

Bypass Identity Verification

The Bypass Identity Verification feature is not used by First National Bank Alaska and should not be marked for any customer.
Entitlements
Check the box beside Manage Business Billing to enable the business to select what account to bill their fees to.
Check the box beside Manager Users to allow the business to manage its own users. This entitlement allows the business administrator to add, edit, or delete another business user. Then a business administrator can edit another business user’s entitlements to allow them to manage other users. A user who can manage others is called a “business manager” in Online Banking.
Example: A new employee is hired. When “Manage Users” is checked, a business administrator or business manager can add the new employee as a new user and give them the appropriate entitlements for their role.

SecureNow Tokens
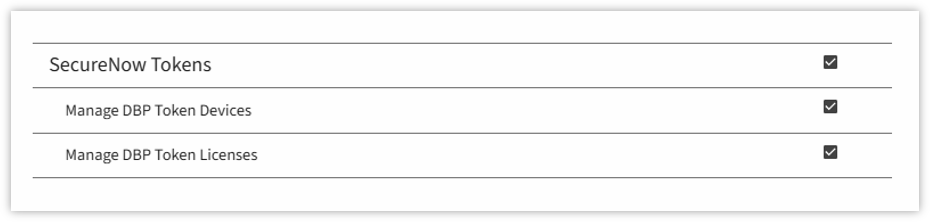
Check the box beside SecureNow Tokens to enable the business to manage SecureNow Tokens. SecureNow is the authentication tool used for Online Banking. Additional checkboxes display. These are default settings for business users.
Check the box Manage SecureNow Token Devices to allow the business to manage tokens.
Check the box Manage SecureNow Token Licenses to allow the business to manage licenses.
First National can enable the business to use one of the business’s licenses for SecureNow. At the business level, the business administrator can assign the license to its business user.
Transfers
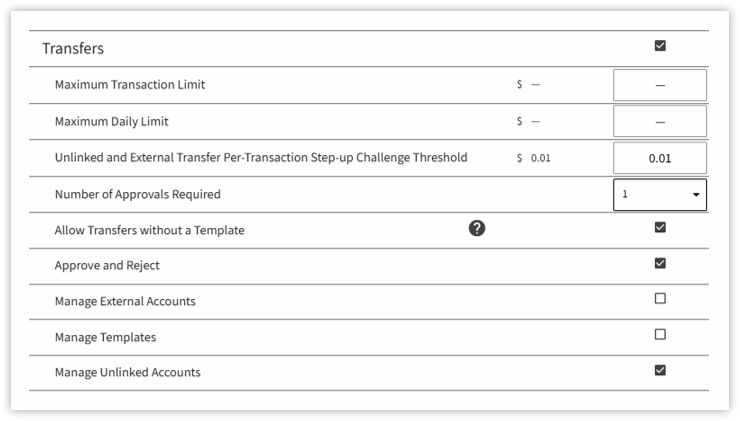
Check the box beside Transfers to set limits for transfers that are internal (between accounts within the bank).
A dash in any entry field indicates that the amount has not been limited. In the case of internal transfers, most businesses would be able to transfer any amount between their internal accounts.
- Leave Maximum Transaction Limit with dash or enter the maximum amount the business can move between accounts.
- Leave Maximum Daily Limit with dash or enter the maximum amount the business can move per day.
- The Number of Approvals Required field applies to transfer templates which a business can create to simplify the transfer process. Select a number from the dropdown menu to indicate how many approvals will be required for someone at the business to create a transfer template: 0, 1 or 2.
- Check the box beside Allow Transfers without a Template to allow the business to do an open transfer — without using a template. When transfers without a template are allowed, the business can pick the FROM account and the TO account and enter the values manually. The business administrator can also give this entitlement to the appropriate users.
- Check the box besides the Approve and Reject to allow business to approve or reject transfers. The approval level here applies to transfer templates only and is set to 2 for the business and the Business Admin if approvals are needed.
- Select the box beside Manage Templates to allow this business to manage its own transfer templates.
- Select the box beside Manage Unlinked Accounts to allow customers at the same bank to share account information with each other.
Zelle®
Check the box beside Zelle to allow the business to send and receive money in real time through Zelle. This is for Zelle for Business. On the business side, Zelle provides business to business, business to consumer and consumer to business real time transfer capability.

Accounts
The Accounts section lists of all the accounts associated with the tax identification number for this business. Select the All Entitlements or check the appropriate entitlements individually. Repeat for each account that the business has.
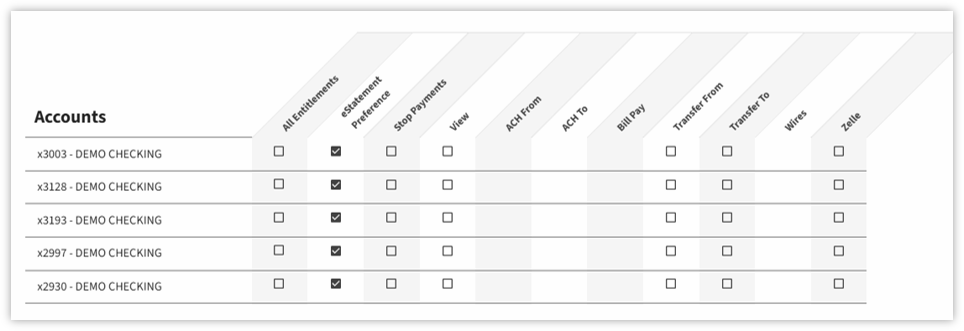
For each account:
Select the checkbox by All Entitlements to allow the business to have all entitlements for this business.
Select the checkbox by eStatementPreference to allow the business to indicate that it prefers eStatements over mailed statements.
Select the checkbox by Stop Payments if the business can may stop payment on this account.
Select the checkbox by View to allow the business to view account details, including transactions.
Select the checkboxes by ACH From and ACH To allow the business to send ACH transactions from this account.
Select the checkbox by Bill Pay to allow the business to do Bill Pay from this account.
Select the checkboxes by Transfer FROM and Transfer TOallow the business to make internal transfers.
Select the checkbox by Wires to allow the business to do Wires from these accounts.
Select the checkbox by Zelle to allow the business to use accounts within Zelle.
Profile
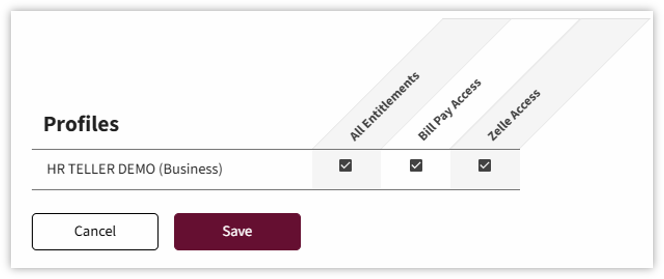
Check the box to allow the business to manage its business profile. This allows it to manage entitlements through the client-side administration tool for additional employees of the business.
When you have finished editing the entitlements, scroll down to select the Save button on the bottom of the screen,
A review screen displays the old and new entitlements for your review.
- Select Cancel to abandon the changes.
- Select Edit to change something.
- Select Confirm to accept the changes.
A confirmation screen displays.
Setting Up the Primary Business User Entitlements
Once the business entitlements have been set up, add the information for the business administration.
- The Business User Profile screen displays, prompting you to complete the information for the business administrator.
Enter the information for the business administrator. Fields with an asterisk are required. Other fields are recommended but not required.
Select Active as the user status.
Select the Save button.
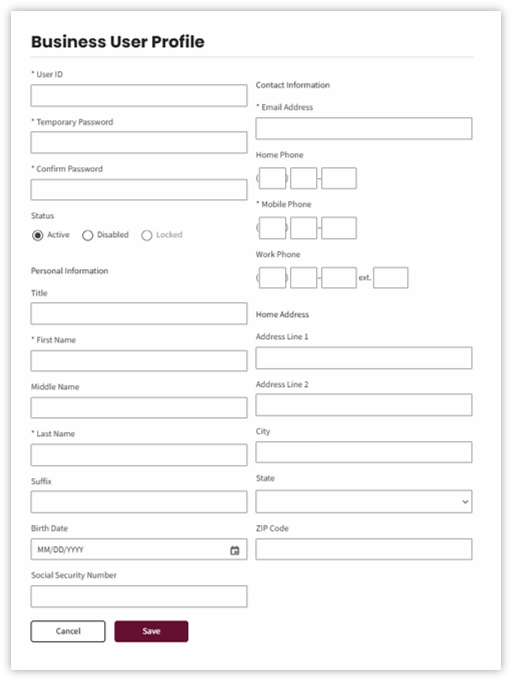
The username should be 9-26 characters. It should be a combination of uppercase letters, lowercase letters, numbers, and special characters. Do not use the user’s date of birth or social security number.
The message confirms that the business user has been added, prompting you to enter the entitlements for this user.

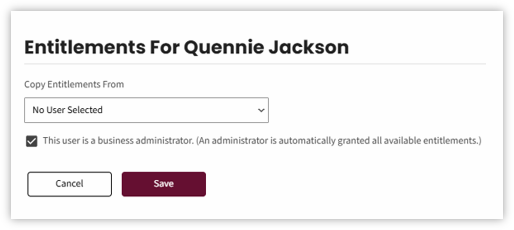
- Select the checkbox next to: “This user is a business administrator.” Business administrators will automatically be granted all the available entitlements for this business.
Select Save.
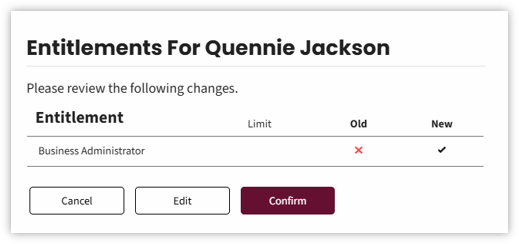
- A review screen displays
- Select Edit to change an entitlement.
- Select Cancel to abandon the changes.
- Select Confirm to accept the changes to entitlements.
A confirmation notice displays along with the Business Selector Screen

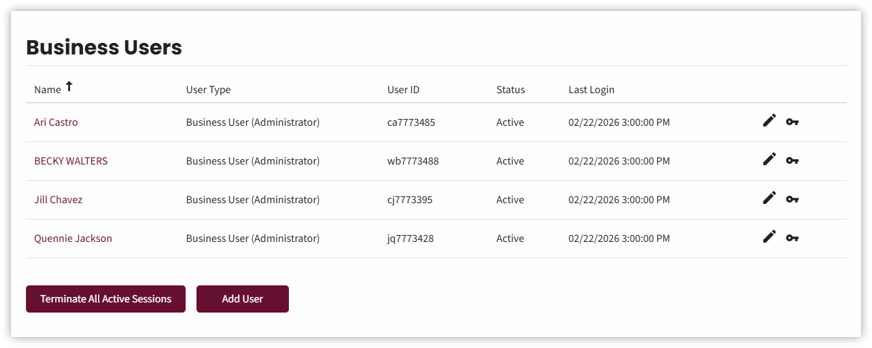
Scroll down to see the sections that can be managed for the business. These sections comprise the Business Manager.
- Scroll down to the Business Users section.
Confirm that the user has been added as the Business Administrator for this business.
Select the checkbox next to: This user is a business administrator. Business administrators will automatically be granted all the available entitlements for this business.